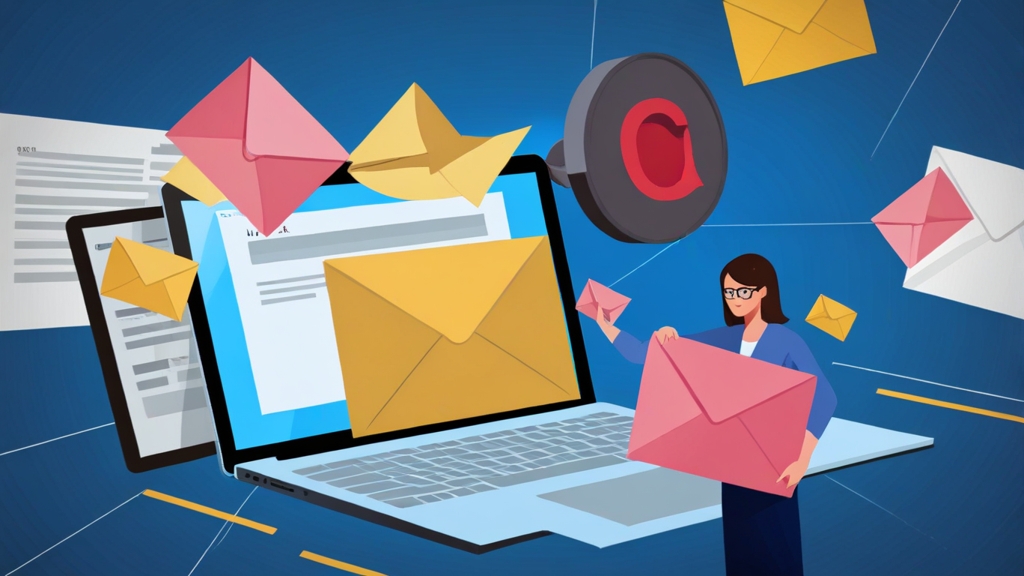
How to Stop Spam Email in Outlook: Mastering Safe Sender and Blocked Sender Lists
Tired of endless spam cluttering your Outlook inbox? This article provides a focused approach to combating spam by mastering the use of Safe Sender and Blocked Sender lists in Microsoft Outlook. We’ll dive deep into how to effectively configure and manage these lists, providing practical examples and best practices to ensure legitimate emails reach you while unwanted messages are filtered out. By the end of this guide, you’ll have the knowledge to significantly reduce spam and improve your email experience.
Table of Contents
- Understanding and Utilizing Safe Sender Lists
- Effectively Managing Blocked Sender Lists
- Optimizing Junk Email Filter Settings for Maximum Protection
- Leveraging Outlook Rules for Advanced Spam Management
- Advanced Techniques and Best Practices for Minimizing Spam
Understanding and Utilizing Safe Sender Lists

The Safe Senders list in Outlook is your whitelist. It’s a curated list of email addresses and domains that you trust implicitly. Emails from these sources will bypass the Junk Email filter and land directly in your inbox. Using this list effectively is crucial for ensuring that important messages from colleagues, family, and key services don’t get mistakenly flagged as spam.
Adding senders to your Safe Senders list is straightforward, but understanding the different methods and options is key. You can add individual email addresses, entire domains, or even email addresses based on your Outlook Contacts list.
Adding Individual Email Addresses to the Safe Senders List
The most common method is adding individual email addresses. This is ideal for ensuring specific contacts always reach your inbox.
- Method 1: From an Email: Open an email from the sender you want to add. Right-click on the sender’s email address in the header of the email. Select “Junk” and then “Never Block Sender”. This automatically adds the sender’s email address to your Safe Senders list.
- Method 2: Through Outlook Settings: Go to Home > Junk > Junk E-mail Options…. In the “Junk E-mail Options” dialog box, select the “Safe Senders” tab. Click “Add…” and enter the email address you want to whitelist. Click “OK” to save.
Example: Let’s say you want to ensure that emails from `john.doe@example.com` always reach your inbox. Using the second method above (Outlook Settings), you would navigate to the “Safe Senders” tab and add `john.doe@example.com` to the list.
Adding Entire Domains to the Safe Senders List
Adding an entire domain to the Safe Senders list is useful when you trust all senders from a specific organization or service. For example, if you trust all emails originating from `@example.com`, adding the domain will ensure all their messages reach your inbox.
Example: To add the domain `example.com` to your Safe Senders list, follow these steps: Go to Home > Junk > Junk E-mail Options…. In the “Junk E-mail Options” dialog box, select the “Safe Senders” tab. Click “Add…” and enter `@example.com`. Click “OK” to save. Now, any email address ending with `@example.com` will bypass the Junk Email filter.
Important Note: Be cautious when adding entire domains to your Safe Senders list. If the domain is compromised or used by spammers, you could inadvertently allow spam into your inbox.
Automatically Adding Contacts to the Safe Senders List
Outlook provides an option to automatically add email addresses from your Contacts list to the Safe Senders list. This is a convenient way to ensure that everyone you regularly communicate with isn’t mistakenly flagged as spam.
To enable this feature, go to Home > Junk > Junk E-mail Options…. In the “Junk E-mail Options” dialog box, select the “Safe Senders” tab. Check the box that says “Also trust e-mail from my Contacts.” Click “OK” to save.
Expert Tip: Regularly review your Contacts list to ensure it only contains legitimate contacts. Delete any outdated or unknown entries to prevent them from being inadvertently added to your Safe Senders list.
Example: If you add a new contact, `jane.smith@company.net`, to your Outlook Contacts, and the “Also trust e-mail from my Contacts” option is enabled, then emails from `jane.smith@company.net` will automatically bypass the Junk Email filter and go directly to your inbox.
Using the Safe Senders list effectively involves careful consideration of who you trust. Regularly review the list to ensure it’s accurate and up-to-date. Over-reliance on domain whitelisting can be risky, so prioritize adding individual addresses whenever possible.
Effectively Managing Blocked Sender Lists

The Blocked Senders list is the counterpart to the Safe Senders list, acting as your blacklist. Email addresses and domains added to this list will automatically be moved to the Junk Email folder, preventing them from cluttering your inbox. Managing this list effectively is crucial for proactively filtering out unwanted messages from known spammers and annoying senders.
Like the Safe Senders list, you can add individual email addresses or entire domains to the Blocked Senders list. You can also block senders directly from within an email message.
Adding Individual Email Addresses to the Blocked Senders List
Adding individual email addresses is the most common way to block specific senders. This is ideal for targeting persistent spammers or senders of unwanted newsletters.
- Method 1: From an Email: Open an email from the sender you want to block. Right-click on the sender’s email address in the header of the email. Select “Junk” and then “Block Sender”. This automatically adds the sender’s email address to your Blocked Senders list.
- Method 2: Through Outlook Settings: Go to Home > Junk > Junk E-mail Options…. In the “Junk E-mail Options” dialog box, select the “Blocked Senders” tab. Click “Add…” and enter the email address you want to block. Click “OK” to save.
Example: You keep receiving unwanted emails from `spam.sender@badwebsite.com`. To block this sender using the second method, you would navigate to the “Blocked Senders” tab in the Junk E-mail Options and add `spam.sender@badwebsite.com` to the list.
Adding Entire Domains to the Blocked Senders List
Blocking an entire domain is a more aggressive approach that should be used with caution. It’s only recommended if you are absolutely certain that all emails from that domain are unwanted. For example, a domain known for hosting phishing scams could be a candidate for domain-level blocking.
Example: To block the domain `phishingwebsite.net`, go to Home > Junk > Junk E-mail Options…. In the “Junk E-mail Options” dialog box, select the “Blocked Senders” tab. Click “Add…” and enter `@phishingwebsite.net`. Click “OK” to save. Now, any email address ending with `@phishingwebsite.net` will be automatically moved to the Junk Email folder.
Warning: Be very careful when blocking entire domains. You could unintentionally block legitimate emails from organizations or services that use that domain. Double-check before adding a domain to the Blocked Senders list.
Reviewing and Editing the Blocked Senders List
It’s essential to periodically review your Blocked Senders list to ensure that it’s accurate and doesn’t contain any legitimate email addresses. Mistakes can happen, and you might accidentally block a sender you later want to receive emails from.
To review and edit your Blocked Senders list, go to Home > Junk > Junk E-mail Options…. In the “Junk E-mail Options” dialog box, select the “Blocked Senders” tab. You’ll see a list of all blocked senders and domains. To remove an entry, select it and click “Remove”.
Example: You accidentally blocked `friend@example.com`. To unblock them, navigate to the Blocked Senders list, select `friend@example.com`, and click “Remove”. You might also want to add `friend@example.com` to your Safe Senders list to ensure their emails always reach your inbox.
Effective management of the Blocked Senders list requires diligence and regular maintenance. Avoid blocking entire domains unless absolutely necessary, and always double-check before adding an entry to prevent accidentally blocking legitimate senders. Regularly review the list to ensure its accuracy and remove any entries that are no longer needed.
Expert Tip: Instead of aggressively blocking domains, consider using Outlook Rules (covered later) to automatically move suspected spam to the Junk Email folder based on keywords or other criteria. This provides a more nuanced approach to spam filtering.
Optimizing Junk Email Filter Settings for Maximum Protection
Outlook’s Junk Email Filter is your first line of defense against spam. It automatically analyzes incoming emails and flags those that are likely to be spam, moving them to the Junk Email folder. Optimizing the settings for this filter is crucial for maximizing its effectiveness while minimizing false positives (legitimate emails being incorrectly flagged as spam).
The Junk Email Filter offers several levels of protection, each with its own trade-offs between aggressiveness and accuracy. You can also configure options to automatically delete suspected junk email and disable links and other functionality in suspicious messages.
Understanding the Junk Email Filter Levels
Outlook offers four primary levels of Junk Email Protection:
- No Automatic Filtering: This disables the Junk Email Filter completely. All emails, regardless of content or source, will be delivered to your inbox. This is not recommended as it leaves you completely vulnerable to spam.
- Low: This level filters the most obvious spam messages. It’s a good starting point for users who want a basic level of protection without being overly aggressive.
- High: This level filters most junk email but might also catch some legitimate messages. You should check your Junk Email folder regularly to make sure you don’t miss any important emails.
- Safe Lists Only: This is the most aggressive level. Only emails from senders or domains on your Safe Senders list will be delivered to your inbox. All other emails will be treated as junk. This requires careful management of your Safe Senders list and is best suited for users who receive a high volume of spam and are willing to risk missing some legitimate messages.
Example: If you’re receiving a moderate amount of spam and want a balance between protection and accuracy, start with the “Low” setting. If you’re still receiving too much spam, try the “High” setting. If you’re overwhelmed by spam and are willing to carefully manage your Safe Senders list, consider the “Safe Lists Only” setting.
To adjust the Junk Email Filter level, go to Home > Junk > Junk E-mail Options…. In the “Junk E-mail Options” dialog box, select the desired level of protection. Click “OK” to save.
Configuring Automatic Deletion of Junk Email
Outlook can be configured to automatically delete emails in the Junk Email folder after a specified period. This helps to keep your mailbox clean and prevents the Junk Email folder from becoming cluttered.
Unfortunately, Outlook’s built-in functionality doesn’t offer granular control over automatic deletion within the Junk Email folder itself. Typically, you’d set broader retention policies for your entire mailbox or specific folders via server-side settings (e.g., Exchange admin center if you’re using Exchange Online or Exchange Server). These settings are usually managed by your IT administrator. However, you *can* manually empty the Junk Email folder regularly.
Workaround (Manual): You can create a recurring task for yourself to empty the Junk Email folder every few days. While not automated, this provides a level of control. Right-click on the Junk Email folder and select “Empty Folder.”
Server-Side Configuration (Example – Exchange Online): In Exchange Online, an administrator can set up retention policies. While this affects more than just the Junk Email folder, it’s the proper way to handle automatic deletion. For example, a policy might dictate that items in the Deleted Items folder are deleted after 30 days, and the same policy could apply to the Junk Email folder. This is configured through the Microsoft 365 admin center.
Caveat: Direct control over the automatic deletion of Junk Email within Outlook is limited to managed server-side policies, meaning end-users typically cannot configure this themselves. Consult your IT department to explore available options.
Disabling Links and Other Functionality in Suspicious Messages
Outlook offers options to enhance security by disabling links, pictures, and other potentially harmful content in emails that are suspected to be junk. This can help to prevent phishing attacks and malware infections.
To configure these settings, go to Home > Junk > Junk E-mail Options…. In the “Junk E-mail Options” dialog box, select the “Options” tab. Here, you can configure the following settings:
- Disable links and other functionality in phishing messages (recommended): This option disables hyperlinks in messages that are identified as potential phishing attempts, preventing you from accidentally clicking on malicious links.
- Warn me about suspicious domain names in email addresses (recommended): This option displays a warning if an email appears to come from a legitimate organization but uses a suspicious domain name.
Example: If you receive an email that claims to be from your bank but has a link to a website with a slightly different domain name (e.g., `yourbank.cm` instead of `yourbank.com`), Outlook will display a warning message, alerting you to the potential phishing attempt. By disabling links, you won’t accidentally click that link.
Optimizing your Junk Email Filter settings involves finding the right balance between protection and accuracy. Experiment with the different filter levels to see what works best for you. Enable the security options to disable links and warn about suspicious domain names to further protect yourself from phishing attacks. While directly managing the Junk Email automatic deletion is limited, the other options give you significant control.
Leveraging Outlook Rules for Advanced Spam Management
Outlook Rules provide a powerful mechanism for automating email management tasks, including spam filtering. Unlike the Junk Email Filter, which relies on pre-defined criteria, Outlook Rules allow you to create custom filters based on specific keywords, sender addresses, subject lines, and other email characteristics. This provides a highly flexible and granular approach to identifying and handling spam.
By creating rules, you can automatically move suspected spam to the Junk Email folder, flag messages with specific keywords, or even delete them entirely. This allows you to tailor your spam filtering strategy to your specific needs and preferences.
Creating a Rule to Move Emails with Specific Keywords to the Junk Email Folder
One of the most common uses of Outlook Rules for spam management is to automatically move emails containing specific keywords to the Junk Email folder. This is useful for targeting common spam phrases or topics.
To create such a rule, follow these steps:
- Go to Home > Rules > Manage Rules & Alerts….
- In the “Rules and Alerts” dialog box, click “New Rule…”.
- Under “Start from a blank rule,” select “Apply rule on messages I receive” and click “Next >”.
- Under “Which condition(s) do you want to check?”, select “with specific words in the subject” and/or “with specific words in the message body”.
- In the “Step 2: Edit the rule description” box, click on the underlined “specific words”.
- Enter the keywords you want to target (e.g., “Viagra”, “Credit Card”, “Limited Time Offer”). Click “Add” after each keyword and then click “OK”.
- Click “Next >”.
- Under “What do you want to do with the message?”, select “move it to the Junk E-mail folder”.
- Click “Next >”.
- (Optional) Add any exceptions to the rule (e.g., “except if it is from people or distribution list”).
- Click “Next >”.
- Give the rule a name (e.g., “Spam Keyword Filter”). Make sure the “Turn on this rule” box is checked.
- Click “Finish”.
Example: To create a rule that moves emails with the words “Loan”, “Mortgage”, or “Refinance” in the subject to the Junk Email folder, you would follow the steps above and add those keywords to the rule. When testing such rules, make sure that they aren’t *too* aggressive: you don’t want them to catch emails from legitimate sources, like your bank.
Creating a Rule to Delete Emails from Specific Senders
While blocking senders is generally preferred, you can use Outlook Rules to automatically delete emails from specific senders. This is a more aggressive approach, but it can be useful for dealing with persistent spammers.
To create a rule to delete emails from specific senders, follow these steps:
- Go to Home > Rules > Manage Rules & Alerts….
- In the “Rules and Alerts” dialog box, click “New Rule…”.
- Under “Start from a blank rule,” select “Apply rule on messages I receive” and click “Next >”.
- Under “Which condition(s) do you want to check?”, select “from people or distribution list”.
- In the “Step 2: Edit the rule description” box, click on the underlined “people or distribution list”.
- Enter the email addresses of the senders you want to block and click “OK”.
- Click “Next >”.
- Under “What do you want to do with the message?”, select “permanently delete it”. Warning: This is irreversible.
- Click “Next >”.
- (Optional) Add any exceptions to the rule.
- Click “Next >”.
- Give the rule a name (e.g., “Delete Spammer Emails”). Make sure the “Turn on this rule” box is checked.
- Click “Finish”.
Warning: Use the “permanently delete it” option with extreme caution. Deleted emails cannot be recovered unless you have a backup. Ensure that you are absolutely certain that you want to delete emails from the specified senders before creating this rule.
Example: You are getting constant phishing attacks from `badactor@totallyfakewebsite.info`. You can set up a rule using the above steps to automatically delete the email instead of just sending it to your Junk E-mail folder.
Using Rules to Flag Suspected Spam
Instead of automatically moving or deleting suspected spam, you can use Outlook Rules to flag these messages for review. This allows you to manually inspect the messages and decide whether to delete them or mark them as not junk.
To create a rule to flag suspected spam, follow these steps:
- Go to Home > Rules > Manage Rules & Alerts….
- In the “Rules and Alerts” dialog box, click “New Rule…”.
- Under “Start from a blank rule,” select “Apply rule on messages I receive” and click “Next >”.
- Select the conditions you want to check (e.g., “with specific words in the subject”).
- Enter the relevant keywords or sender addresses.
- Click “Next >”.
- Under “What do you want to do with the message?”, select “flag message” and choose a flag (e.g., “Follow Up”). You can also select “assign it to the category” and choose a category (e.g., “Suspected Spam”).
- Click “Next >”.
- (Optional) Add any exceptions to the rule.
- Click “Next >”.
- Give the rule a name (e.g., “Flag Suspected Spam”). Make sure the “Turn on this rule” box is checked.
- Click “Finish”.
Example: You want to flag emails that contain the word “Investment” in the subject line. You could set up a rule that flags these messages with the “Follow Up” flag. This helps you quickly identify potential spam without automatically moving it to the Junk Email folder.
Leveraging Outlook Rules provides a powerful and customizable approach to spam management. By creating rules based on specific keywords, sender addresses, and other criteria, you can tailor your spam filtering strategy to your specific needs and preferences. Remember to use the “permanently delete it” option with caution, and always test your rules thoroughly to ensure they are working as intended and not accidentally filtering legitimate emails. Combining the Safe Senders list with strong, customized rules is a very effective spam-fighting strategy.
Advanced Techniques and Best Practices for Minimizing Spam
While Safe Sender and Blocked Sender lists, Junk Email Filter settings, and Outlook Rules are effective tools for combating spam, there are additional advanced techniques and best practices you can implement to further minimize the amount of spam you receive. These include protecting your email address, using strong passwords, being cautious of phishing attempts, and leveraging reporting mechanisms to help improve spam filtering for everyone.
By adopting these advanced techniques and best practices, you can significantly reduce your exposure to spam and create a more secure and productive email experience.
Protecting Your Email Address
One of the most effective ways to reduce spam is to protect your email address and limit its exposure to potential spammers. Avoid posting your email address publicly on websites, forums, or social media platforms. Be wary of online forms that require your email address, and only provide it to trusted sources.
- Use a separate email address for online registrations and newsletters: Create a secondary email address specifically for signing up for online services, newsletters, and other non-essential communications. This helps to keep your primary email address clean and reduces the risk of spam.
- Use a disposable email address for one-time registrations: For websites that require an email address for a one-time registration, consider using a disposable email address service. These services provide temporary email addresses that expire after a certain period, preventing spammers from collecting your real email address.
- Be cautious of email harvesting bots: Spammers use automated bots to scan websites and forums for email addresses. Avoid posting your email address in plain text. Instead, use techniques like image-based email addresses or “at” and “dot” substitutions (e.g., `john at example dot com`) to prevent bots from automatically collecting your address.
Example: Instead of posting `john.doe@example.com` on a public forum, use `john[at]example[dot]com`. Humans can easily understand that; robots can’t.
Using Strong Passwords and Enabling Two-Factor Authentication
A strong password is essential for protecting your email account from unauthorized access. Use a unique password that is at least 12 characters long and includes a combination of uppercase and lowercase letters, numbers, and symbols. Avoid using easily guessable information like your name, birthday, or common words.
Enable two-factor authentication (2FA) for your email account to add an extra layer of security. With 2FA enabled, you’ll need to provide a second form of verification (e.g., a code sent to your phone) in addition to your password when logging in from a new device. This makes it much more difficult for hackers to access your account, even if they know your password.
- Use a password manager: Password managers can help you generate and store strong, unique passwords for all of your online accounts. They also make it easy to automatically fill in your passwords when logging in to websites and apps.
- Change your password regularly: Change your email password every few months to further reduce the risk of unauthorized access.
Example: Instead of using the password “password123”, try a strong, unique password like “Tr8#Lp9@Wz2$”. Even better, let a password manager create and store that for you.
Being Cautious of Phishing Attempts
Phishing emails are designed to trick you into revealing sensitive information, such as your password, credit card number, or social security number. Be cautious of emails that ask you to click on a link or open an attachment, especially if the email is unexpected or comes from an unknown sender.
- Verify the sender’s identity: Before clicking on any links or opening any attachments, verify the sender’s identity. If the email claims to be from a legitimate organization, contact the organization directly to confirm that the email is legitimate.
- Look for red flags: Phishing emails often contain grammatical errors, typos, and suspicious formatting. Be wary of emails that use urgent or threatening language, or that ask you to take immediate action.
- Hover over links before clicking: Hover your mouse cursor over a link to see the actual URL. If the URL looks suspicious or doesn’t match the website it’s supposed to link to, don’t click on it.
Example: If you receive an email claiming to be from your bank asking you to update your account information, do NOT click the link in the email. Instead, go directly to your bank’s website by typing the address into your browser.
Reporting Spam
Most email providers, including Outlook, provide mechanisms for reporting spam. By reporting spam, you help to improve spam filtering for everyone. When you report an email as spam, the email provider analyzes the message and uses the information to improve its spam filters.
Example: Within Outlook, use the “Junk” -> “Report Junk” option in the ribbon, or right-click on the message and select “Junk” -> “Report Junk”.
Minimizing spam requires a multi-faceted approach. Protecting your email address, using strong passwords, being cautious of phishing attempts, and reporting spam are all essential steps. By implementing these advanced techniques and best practices, you can significantly reduce the amount of spam you receive and create a more secure and productive email experience.