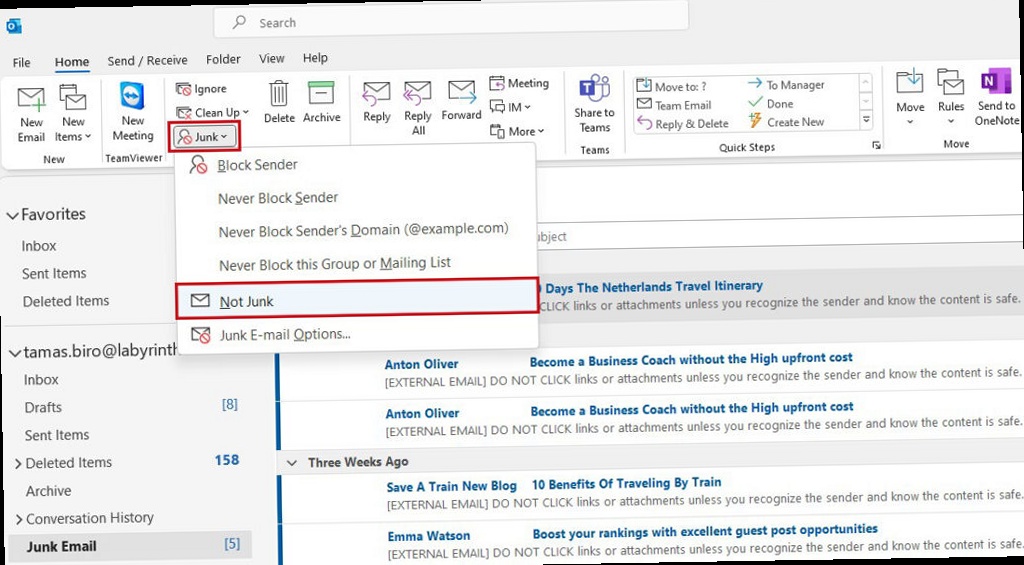
Sign In
Deliverability

How to Fix Outlook Emails Going to Spam

Why Your Outlook Emails Are Landing in Spam and How to Fix It

Is your carefully crafted email campaign failing to reach its intended audience, instead languishing in Outlook’s spam folder? This is a common frustration for marketers and businesses alike. This article dives deep into the specific reasons why Outlook might be filtering your emails as spam, and, more importantly, provides practical, actionable steps you can take to improve your deliverability and ensure your messages reach the inbox.

Table of Contents

Understanding Outlook’s Spam Filters

Outlook emails going to spam - Illustration of Outlook's spam filtering process, potentially a flow chart.
Outlook, like other email providers, employs sophisticated spam filters to protect its users from unwanted and potentially harmful messages. These filters analyze various aspects of an email, including its content, sender reputation, and authentication protocols, to determine whether it should be delivered to the inbox or relegated to the spam folder. Understanding how these filters operate is crucial for improving your email deliverability. Outlook’s spam filters utilize a combination of techniques:
  • Content Filtering: Analyzes the email’s subject line, body, and HTML code for spam-like keywords, suspicious links, and formatting inconsistencies.
  • Sender Reputation: Evaluates the sender’s IP address and domain reputation based on factors like bounce rates, spam complaints, and blacklist listings.
  • Authentication Protocols: Verifies the sender’s identity using SPF, DKIM, and DMARC records.
  • User Feedback: Incorporates user reports of spam and “not spam” actions to improve filter accuracy.
  • Heuristic Analysis: Identifies patterns and characteristics commonly associated with spam emails.
Common Reasons for Emails Landing in Spam Several factors can contribute to Outlook classifying your emails as spam. These include:
  • Poor Sender Reputation: A low sender reputation, often due to high bounce rates or spam complaints, is a major red flag.
  • Missing or Incorrect Authentication Records: Lack of SPF, DKIM, or DMARC records makes it difficult for Outlook to verify your identity.
  • Spammy Content: Using excessive capitalization, exclamation points, or certain keywords can trigger spam filters.
  • High Bounce Rate: A high percentage of undeliverable emails indicates a problem with your email list.
  • Blacklist Listing: Being listed on a public or private blacklist can severely impact your deliverability.
  • Lack of User Engagement: If recipients rarely open or click on your emails, Outlook may perceive your messages as less relevant and filter them accordingly.
Practical Examples and Solutions Let’s examine some practical scenarios and their corresponding solutions: Example 1: Missing SPF Record Problem: You send emails from your domain `example.com`, but you haven’t configured an SPF record. Outlook cannot verify that your email server is authorized to send emails on behalf of your domain. Solution: Create an SPF record that specifies the IP addresses of your authorized email servers.
v=spf1 ip4:192.0.2.0/24 ip4:198.51.100.0/24 include:thirdpartyemailservice.com -all
Explanation:
  • `v=spf1`: Specifies the SPF version.
  • `ip4:192.0.2.0/24`: Authorizes all IP addresses in the 192.0.2.0/24 range.
  • `ip4:198.51.100.0/24`: Authorizes all IP addresses in the 198.51.100.0/24 range.
  • `include:thirdpartyemailservice.com`: Authorizes a third-party email service to send emails on your behalf. Replace `thirdpartyemailservice.com` with the actual domain name.
  • `-all`: Specifies a hard fail for any IP addresses not listed in the record.
You would add this TXT record to your domain’s DNS settings. Consult your DNS provider’s documentation for specific instructions. Example 2: Spammy Subject Line Problem: Your email subject line is “!!!GET RICH QUICK!!!”. This is a classic spam trigger. Solution: Rewrite the subject line to be more descriptive and less sensational. For example, “Learn Proven Strategies for Investing in Stocks.” Explanation: Avoid excessive capitalization, exclamation points, and words associated with scams or get-rich-quick schemes. Example 3: High Bounce Rate Problem: You’re experiencing a high bounce rate (e.g., 10%) on your email campaigns. Solution: Clean your email list by removing invalid or inactive email addresses. Use an email verification service to identify and remove these addresses. Explanation: High bounce rates damage your sender reputation. Regularly cleaning your list improves your deliverability. Consider using a double opt-in process to ensure the validity of email addresses collected.

“Email deliverability is not just about technology; it’s about trust. Building and maintaining a good sender reputation is paramount to reaching the inbox.”

John Smith, hubspot-email-marketing-tactics-to-boost-roi/" class="internal-link" title="3 Hubspot Email Marketing Tactics to Boost ROI">Email Marketing Expert

Implementing Email Authentication Protocols (SPF, DKIM, DMARC)
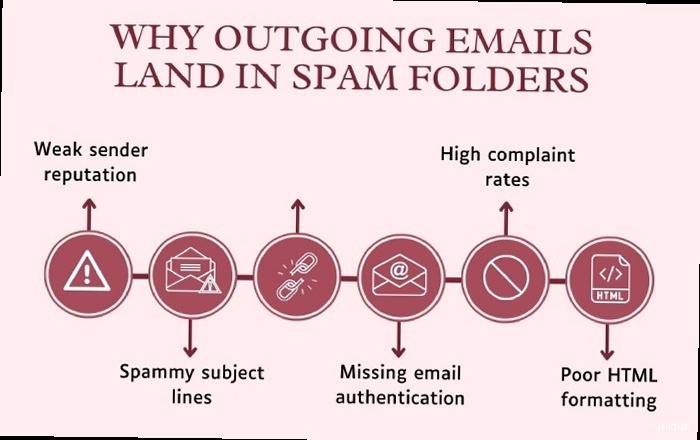
Outlook emails going to spam - Diagram illustrating SPF, DKIM, and DMARC working together.
Email authentication protocols are essential for verifying your identity as a sender and preventing email spoofing. Implementing SPF, DKIM, and DMARC can significantly improve your email deliverability to Outlook and other email providers. SPF (Sender Policy Framework) SPF is a DNS record that specifies which mail servers are authorized to send emails on behalf of your domain. When an email server receives a message claiming to be from your domain, it checks the SPF record to verify that the sending server is authorized. Example:
v=spf1 a mx include:thirdpartyemailservice.com ~all
Explanation:
  • `v=spf1`: Specifies the SPF version.
  • `a`: Authorizes the IP addresses listed in the A record for your domain.
  • `mx`: Authorizes the mail servers listed in the MX records for your domain.
  • `include:thirdpartyemailservice.com`: Authorizes a third-party email service.
  • `~all`: Specifies a soft fail for any IP addresses not listed in the record. The tilde (~) indicates a “soft fail”, meaning the email *should* still be accepted, but flagged. A hard fail, indicated by `-all`, means the email *should* be rejected.
DKIM (DomainKeys Identified Mail) DKIM adds a digital signature to your emails, which allows receiving servers to verify that the message hasn’t been tampered with during transit. The signature is generated using a private key and verified using a public key stored in your DNS records. Example: The process for setting up DKIM varies depending on your email provider or server. Typically, you will generate a DKIM key pair and add the public key to your DNS records. The private key is then used to sign your outgoing emails. For example, if you’re using SendGrid, they provide a DKIM record to add to your DNS. It will look something like this:
s1._domainkey.example.com. IN TXT "v=DKIM1; k=rsa; p=MIGfMA0GCSqGSIb3DQEBAQUAA4GNADCBiQKBgQDJmR0Dj+..."
Explanation:
  • `s1._domainkey.example.com`: The selector and domain for the DKIM record.
  • `v=DKIM1`: Specifies the DKIM version.
  • `k=rsa`: Specifies the key type.
  • `p=MIGfMA0GCSqGSIb3DQEBAQUAA4GNADCBiQKBgQDJmR0Dj+…`: The public key.
DMARC (Domain-based Message Authentication, Reporting & Conformance) DMARC builds upon SPF and DKIM by providing instructions to receiving servers on how to handle emails that fail authentication checks. It also allows you to receive reports on email authentication results, which can help you identify and address deliverability issues. Example:
_dmarc.example.com. IN TXT "v=DMARC1; p=none; rua=mailto:dmarc-reports@example.com; ruf=mailto:forensic-reports@example.com"
Explanation:
  • `_dmarc.example.com`: The standard subdomain for the DMARC record.
  • `v=DMARC1`: Specifies the DMARC version.
  • `p=none`: Specifies the policy for handling emails that fail authentication. `none` means take no action (monitor only). `quarantine` means send to spam. `reject` means reject the email. Start with `none` to monitor your traffic before moving to stricter policies.
  • `rua=mailto:dmarc-reports@example.com`: Specifies the email address to which aggregate reports should be sent.
  • `ruf=mailto:forensic-reports@example.com`: Specifies the email address to which forensic reports (sample emails that failed authentication) should be sent. This is less commonly used due to privacy concerns.
Setting up DMARC correctly is crucial. It is best to start with a `p=none` policy and monitor the reports to identify any legitimate emails that are failing authentication. Then, gradually move to a stricter policy like `p=quarantine` or `p=reject` as you gain confidence in your configuration. Incorrect DMARC settings can cause legitimate emails to be blocked. Verifying Your Authentication Records After implementing SPF, DKIM, and DMARC, it’s essential to verify that your records are correctly configured. You can use online tools like MXToolbox or DMARC Analyzer to check your records. For example, to check your SPF record using `dig` on Linux/macOS, you would use the following command:
dig txt example.com
The output will show the TXT records for your domain, including the SPF record. Make sure it matches what you expect. Similar commands can be used to check DKIM and DMARC records. Using online tools simplifies the process, providing a user-friendly interface and clear error reporting.

Optimizing Email Content to Avoid Spam Triggers

The content of your emails plays a significant role in determining whether they land in the inbox or the spam folder. Avoiding spam trigger words, optimizing your HTML code, and providing clear unsubscribe options are crucial for improving deliverability. Avoiding Spam Trigger Words and Phrases Certain words and phrases are commonly associated with spam emails and can trigger spam filters. Avoid using these words in your subject lines and body copy. Some examples include:
  • “Free” (especially in the subject line)
  • “Guaranteed”
  • “Act now!”
  • “Limited time offer”
  • “Click here!”
  • “As seen on”
  • “Earn $…”
  • “Work from home”
  • “Miracle”
  • “Increase traffic”
While using these words occasionally may not automatically result in your email being marked as spam, excessive use or combining multiple spam trigger words significantly increases the risk. Example: Instead of: “FREE! Click here to get guaranteed results now!” Try: “Learn how to improve your results with these helpful tips.” Optimizing HTML Code and Formatting Poorly formatted HTML code can also trigger spam filters. Follow these best practices:
  • Use clean HTML: Avoid using excessive or unnecessary HTML tags.
  • Optimize image sizes: Large images can slow down loading times and trigger spam filters. Compress images before including them in your emails.
  • Use alt text for images: Add descriptive alt text to your images to provide context for users who have images disabled.
  • Avoid using inline CSS: While sometimes necessary, try to minimize inline CSS. Too much can be a spam indicator.
  • Maintain a good text-to-image ratio: Emails with mostly images and very little text are often flagged as spam. Aim for a balance between text and images.
Example: Instead of using a large, unoptimized image:
<img src="large-image.jpg">
Use a compressed image with alt text:
<img src="optimized-image.jpg" alt="Description of the image" width="600" height="400">
Providing Clear Unsubscribe Options Providing a clear and easy-to-find unsubscribe link is not only a legal requirement in many jurisdictions (e.g., CAN-SPAM Act in the US, GDPR in Europe) but also a best practice for maintaining a good sender reputation. Make sure your unsubscribe link is visible and functional. Example: Include a clear unsubscribe link in the footer of your email:
<p>If you no longer wish to receive emails from us, you can <a href="[UNSUBSCRIBE_LINK]">unsubscribe here</a>.</p>
Ensure that the unsubscribe process is simple and straightforward. Avoid requiring users to log in or complete multiple steps to unsubscribe. Failure to provide a working unsubscribe option or making it difficult to unsubscribe can lead to spam complaints, which will negatively impact your sender reputation. Personalization and Segmentation Personalizing your emails and segmenting your audience can significantly improve engagement and reduce the likelihood of your emails being marked as spam. Send relevant content to specific groups of recipients based on their interests and preferences. Example: Instead of sending the same email to your entire list, segment your audience based on their past purchases or website activity. For example, send a targeted email about new product features to users who have previously purchased similar products. Personalize the email with the recipient’s name and other relevant information.

Monitoring and Maintaining Your IP Reputation

Your IP address’s reputation is a critical factor in email deliverability. A poor IP reputation can lead to your emails being blocked or sent to the spam folder. Monitoring your IP reputation and taking steps to maintain it are essential. Understanding IP Reputation IP reputation is a measure of the trustworthiness of your sending IP address. Email providers like Outlook use IP reputation to determine whether to accept emails from your server. A good IP reputation indicates that you are a responsible sender who follows best practices. A poor IP reputation suggests that you may be sending spam or engaging in other harmful activities. Factors that influence IP reputation include:
  • Spam complaints: The number of recipients who mark your emails as spam.
  • Bounce rates: The percentage of emails that are undeliverable.
  • Blacklist listings: Whether your IP address is listed on any public or private blacklists.
  • Email volume: Sending large volumes of emails suddenly can raise red flags.
  • Authentication: Whether you are using SPF, DKIM, and DMARC.
Monitoring Blacklists Blacklists are databases that contain IP addresses and domain names that have been identified as sources of spam. Being listed on a blacklist can severely impact your email deliverability. It’s crucial to monitor your IP address on blacklists regularly. You can use online tools like MXToolbox, WhatIsMyIPAddress, or MultiRBL to check your IP address against multiple blacklists simultaneously. Example: Using MXToolbox, you can enter your IP address and select “Blacklist Check” to see if your IP is listed on any blacklists. The tool will display a list of blacklists and indicate whether your IP is listed on each one. If you find that your IP address is listed on a blacklist, you will need to take steps to remove it. The process for removal varies depending on the blacklist. Typically, it involves submitting a delisting request and addressing the issues that led to your listing. Maintaining a Clean Email List Maintaining a clean and up-to-date email list is essential for protecting your IP reputation. Regularly remove invalid or inactive email addresses. Use an email verification service to identify and remove invalid email addresses. Implement a double opt-in process to ensure that recipients actively subscribe to your email list. Provide clear unsubscribe options and promptly remove users who unsubscribe. Example: Implement a double opt-in process on your website signup form. After a user submits their email address, send a confirmation email with a link they must click to confirm their subscription. This helps prevent spambots and invalid email addresses from being added to your list. Warming Up Your IP Address If you are using a new IP address for sending emails, it’s important to “warm up” the IP gradually. Sending large volumes of emails suddenly from a new IP address can trigger spam filters. Start by sending small volumes of emails to your most engaged subscribers and gradually increase the volume over time. Monitor your deliverability and engagement metrics closely during the warm-up process. Example: If you are starting with a new IP address, begin by sending 100-200 emails per day to your most engaged subscribers. Increase the volume by 10-20% each day, while monitoring your bounce rates and spam complaints. Gradually increase the volume until you reach your desired sending volume.

Leveraging Feedback Loops and Encouraging Engagement

Feedback loops (FBLs) provide valuable information about spam complaints, allowing you to identify and address issues that are impacting your deliverability. Encouraging engagement with your emails can also improve your sender reputation and prevent your messages from being marked as spam. Understanding Feedback Loops (FBLs) A feedback loop is a mechanism that allows email providers to notify senders when recipients mark their emails as spam. When a recipient clicks the “Report Spam” button in their email client, the email provider sends a notification to the sender through the FBL. Participating in FBLs is essential for identifying and removing subscribers who are likely to mark your emails as spam. This helps improve your sender reputation and reduce the number of spam complaints. Example: Outlook provides a feedback loop program that allows you to receive reports of spam complaints. To participate in the Outlook FBL, you need to register your sending IP address and domain and configure your system to receive and process the FBL reports. Encouraging User Engagement High engagement rates (opens, clicks, replies) indicate that your emails are relevant and valuable to recipients. Low engagement rates can signal to email providers that your emails are unwanted. Strategies for encouraging user engagement include:
  • Sending relevant content: Tailor your email content to the interests and preferences of your subscribers.
  • Personalizing your emails: Use the recipient’s name and other relevant information to personalize your emails.
  • Using a clear and concise subject line: Make it easy for recipients to understand the purpose of your email.
  • Including a clear call to action: Tell recipients what you want them to do (e.g., click a link, make a purchase, reply to the email).
  • Asking questions: Encourage recipients to reply to your emails by asking questions or soliciting feedback.
  • Running contests or giveaways: Incentivize recipients to engage with your emails by offering prizes or rewards.
Example: In your welcome email, ask new subscribers what topics they are most interested in. Use their responses to segment your audience and send them relevant content. Include a clear call to action in your emails, such as “Click here to learn more” or “Reply to this email with your questions.” Handling Unsubscribes and Complaints Responsibly Promptly honor unsubscribe requests and remove users who unsubscribe from your list. Investigate and address the root causes of spam complaints. Don’t ignore spam complaints. Use the information from feedback loops to identify and address any issues with your sending practices or email content. Example: If you receive a spam complaint, review the email that was flagged as spam and identify any potential issues with the content, subject line, or sending practices. Take steps to address these issues to prevent future complaints. If you accidentally added someone to your list without their consent, immediately remove them and apologize for the error. By implementing these strategies, you can significantly improve your email deliverability to Outlook and ensure that your messages reach the inbox, not the spam folder.

Share this article