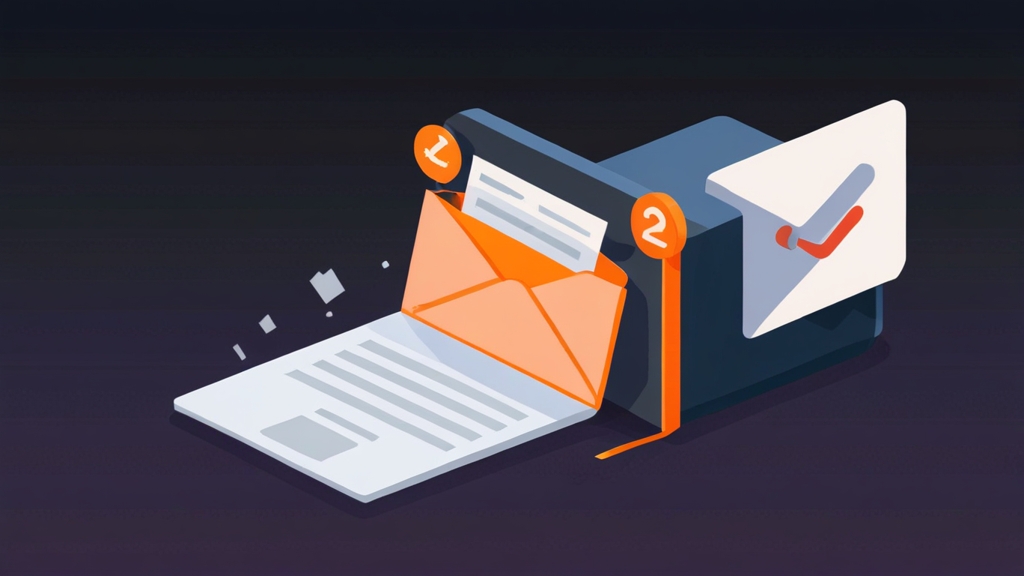
How to Log Emails in HubSpot: A Comprehensive Guide
Effectively logging emails in HubSpot is crucial for maintaining accurate customer relationship data and optimizing your sales and marketing efforts. This guide provides a detailed walkthrough of various methods to log emails in HubSpot, ensuring seamless integration with your CRM. From manual logging to automated solutions, we’ll explore the tools and techniques you need to capture and track email interactions effectively.
Table of Contents
- Manual Email Logging in HubSpot
- Using the HubSpot Sales Extension for Email Logging
- Connecting Your Inbox to HubSpot for Automatic Logging
- Troubleshooting Email Logging Issues
Manual Email Logging in HubSpot
Manual email logging provides a way to record email interactions when automated methods aren’t feasible or when you need more control over what’s being logged. This is particularly useful for emails sent outside of your connected inbox or when dealing with specific situations that require precise documentation. It ensures that all relevant communications are captured within the HubSpot CRM, maintaining a complete customer history. However, it’s worth noting that manually logging email is more time-consuming, so automation where possible is still the best approach.
Step-by-Step Guide to Manual Logging
- Navigate to the Contact Record: Within HubSpot, locate the contact, company, or deal record to which you want to associate the email.
- Click ‘Log Email’: In the activity timeline, click the ‘Log Email’ button. This will open a new window where you can input the email details.
- Enter Email Details: Fill in the required fields, including the ‘From’ and ‘To’ addresses, the subject line, and the email body. You can also specify the date and time the email was sent.
- Associate with Records: Ensure the email is associated with the correct contact, company, or deal records. HubSpot usually suggests related records based on email addresses, but double-check for accuracy.
- Save the Logged Email: Once all details are entered, click the ‘Save’ button. The email will now appear in the activity timeline of the associated records.
Example Scenario: Logging an Email from a Third-Party Tool
Let’s say you sent an email to a prospect using a tool outside of your connected inbox, such as a specialized industry platform. To manually log this email:
- Open the prospect’s contact record in HubSpot.
- Click the “Log Email” button.
- In the “From” field, enter your email address.
- In the “To” field, enter the prospect’s email address.
- Copy and paste the email subject and body into the respective fields.
- Set the correct date and time the email was sent.
- Associate the email with the prospect’s contact record (HubSpot should suggest this automatically).
- Click “Save.”
Adding Attachments to Manually Logged Emails
Unfortunately, direct attachment uploading is not available when manually logging emails via the HubSpot interface. To include an attachment, you need to find a workaround. The best way to handle this is usually:
- Upload the file to a file hosting service like Google Drive, Dropbox, or even HubSpot’s own file manager.
- Get a shareable link to the file.
- Include the link within the body of the manually logged email.
This ensures the recipient and anyone viewing the email log in HubSpot can access the document. Always ensure the sharing permissions are set correctly so others can view the attached file.
Best Practices for Manual Email Logging
- Be Consistent: Establish a clear process and stick to it to ensure all relevant emails are logged.
- Accuracy is Key: Double-check all details, especially email addresses and dates, to avoid errors.
- Use Notes: Add relevant notes or context to the email body to provide additional information. If you had a phone call right after, add that to the notes section of the logged email.
- Associate Properly: Ensure the email is associated with all relevant records (contacts, companies, deals) for a complete view.
Manual email logging, while not ideal for high-volume situations, provides a valuable tool for capturing important communications that would otherwise be missed by automated systems. By following these steps and best practices, you can maintain a comprehensive and accurate record of all email interactions within your HubSpot CRM.
Expert Tip: To save time, create email templates for frequently sent messages. You can copy and paste the content into the manual logging window, reducing the need to retype the same information repeatedly.
Using the HubSpot Sales Extension for Email Logging
The HubSpot Sales extension is a powerful tool for seamlessly logging emails directly from your inbox. It integrates with popular email clients like Gmail and Outlook, allowing you to track and log emails with just a few clicks. This eliminates the need for manual data entry and ensures that all important communications are automatically recorded in HubSpot.
Installing and Configuring the HubSpot Sales Extension
- Download the Extension: Go to the HubSpot website and download the Sales extension for your email client (Gmail or Outlook).
- Install the Extension: Follow the installation instructions provided by HubSpot. This usually involves adding the extension to your browser or email client.
- Connect to HubSpot: Once installed, the extension will prompt you to connect to your HubSpot account. Enter your HubSpot credentials to authenticate the connection.
- Configure Settings: Review the extension settings to customize how emails are tracked and logged. You can choose to automatically log all emails or only log specific emails based on your preferences.
Logging Emails with the Sales Extension
Once the extension is installed and configured, logging emails is straightforward:
- Compose Your Email: Write your email in Gmail or Outlook as usual.
- Select Logging Options: Before sending, look for the HubSpot Sales extension options within your email composition window. You’ll typically see checkboxes for “Track” and “Log to HubSpot.”
- Track Email Opens: Check the “Track” box to receive notifications when the recipient opens the email. This is different than logging, tracking just shows when the email was opened and how many times.
- Log to HubSpot: Check the “Log to HubSpot” box to automatically save a copy of the email to the contact’s record in HubSpot.
- Send Your Email: Click the “Send” button. The extension will automatically track and log the email based on your selected options.
Example Scenario: Tracking and Logging a Sales Follow-Up Email
You’re sending a follow-up email to a potential client after a sales meeting. To track and log this email using the HubSpot Sales extension:
- Compose your follow-up email in Gmail or Outlook.
- Before sending, locate the HubSpot Sales extension options (usually at the bottom of the composition window).
- Check both the “Track” and “Log to HubSpot” boxes.
- Send the email.
- You’ll receive a notification when the client opens the email, and a copy of the email will be automatically saved to their contact record in HubSpot.
Customizing Logging Behavior
The HubSpot Sales extension offers several options for customizing how emails are logged:
- Automatic Logging: You can configure the extension to automatically log all outgoing emails to HubSpot. This is convenient but may result in logging some irrelevant emails.
- Selective Logging: You can choose to only log specific emails by checking the “Log to HubSpot” box for each email individually. This gives you more control over what’s being logged.
- Associated Records: The extension automatically associates emails with related contact, company, and deal records in HubSpot. You can review and adjust these associations if needed.
Best Practice: Regularly review your HubSpot Sales extension settings to ensure they align with your logging preferences. Adjust the settings as needed to optimize the accuracy and efficiency of your email logging process.
The HubSpot Sales extension significantly simplifies email logging, providing a seamless and efficient way to capture email interactions within your HubSpot CRM. By leveraging its features and customizing its settings, you can ensure that all important communications are automatically tracked and recorded, giving you a complete view of your customer relationships.
External Link: For more detailed information on the HubSpot Sales extension, visit the HubSpot Knowledge Base.
Connecting Your Inbox to HubSpot for Automatic Logging
Connecting your inbox to HubSpot is the most efficient way to log emails, automating the process and ensuring that all relevant communications are captured without manual intervention. This integration allows HubSpot to automatically track and log both incoming and outgoing emails, providing a comprehensive view of your email interactions within the CRM. This method also gives you access to useful features such as sending emails directly from HubSpot using your connected inbox.
Supported Email Providers
HubSpot supports connections with the following email providers:
- Gmail: Google’s popular email service.
- Outlook: Microsoft’s email service (including Office 365).
- Office 365: Microsoft’s subscription service that includes email.
- IMAP: IMAP connections are supported, but generally, Gmail or Outlook connections are preferable for features and reliability.
Step-by-Step Guide to Connecting Your Inbox
- Navigate to HubSpot Settings: In your HubSpot account, click the settings icon (gear icon) in the main navigation bar.
- Go to Integrations: In the left sidebar menu, navigate to “Integrations” and then select “Email Integrations.”
- Connect Your Inbox: Click the “Connect Inbox” button.
- Select Your Provider: Choose your email provider (Gmail, Outlook, or Office 365).
- Authenticate Your Account: Follow the prompts to authenticate your email account. This usually involves signing in to your email account and granting HubSpot permission to access your email.
- Configure Logging Settings: After connecting your inbox, you can configure settings such as automatic email logging and tracking.
Example Scenario: Connecting a Gmail Account to HubSpot
To connect your Gmail account to HubSpot:
- Go to HubSpot settings and navigate to “Integrations” > “Email Integrations.”
- Click “Connect Inbox” and select “Gmail.”
- Sign in to your Google account and grant HubSpot the necessary permissions (access to your email, contacts, and calendar).
- Configure the logging settings to automatically log all emails.
- Once connected, HubSpot will start automatically logging your Gmail communications.
Configuring Email Logging Settings
After connecting your inbox, you can customize the following logging settings:
- Automatic Email Logging: Enable this option to automatically log all incoming and outgoing emails to HubSpot.
- Contacts Creation: Choose whether to automatically create new contacts in HubSpot from unknown email addresses.
- Tracking: Enable email tracking to receive notifications when recipients open your emails.
- Exclusion List: Add specific email addresses or domains to exclude from logging. This is helpful to exclude internal communications, for example.
Benefits of Connecting Your Inbox
- Automation: Automates email logging, saving time and effort.
- Comprehensive View: Provides a complete view of all email interactions within HubSpot.
- Improved Data Accuracy: Reduces the risk of manual errors and omissions.
- Enhanced Collaboration: Allows sales and marketing teams to easily access and share email communications.
Quote: “Connecting your inbox to HubSpot is the foundation for effective email tracking and management. It ensures that your CRM data is always up-to-date, providing valuable insights into your customer relationships.” – A HubSpot Expert
Connecting your inbox to HubSpot is a critical step for streamlining your email logging process and maximizing the value of your CRM. By automating email capture and providing a comprehensive view of your communications, you can improve data accuracy, enhance collaboration, and gain valuable insights into your customer interactions.
Troubleshooting Email Logging Issues
Even with the best setup, email logging can sometimes encounter issues. This section provides troubleshooting steps for common problems, ensuring your email data remains accurate and complete within HubSpot. Identifying and resolving these issues promptly is crucial for maintaining the integrity of your CRM data and optimizing your sales and marketing efforts.
Common Email Logging Problems
- Emails Not Logging: Emails are not being automatically logged to HubSpot.
- Incorrect Association: Emails are being associated with the wrong contact, company, or deal records.
- Missing Attachments: Attachments are not being logged with the emails.
- Tracking Issues: Email open and click tracking is not working correctly.
- Connection Errors: Issues connecting your inbox to HubSpot.
Troubleshooting Steps and Solutions
| Problem | Troubleshooting Steps | Solution |
|---|---|---|
| Emails Not Logging | 1. Check your inbox connection status in HubSpot settings. 2. Verify that automatic email logging is enabled. 3. Ensure the email address is not on the exclusion list. | 1. Reconnect your inbox if the connection is broken. 2. Enable automatic email logging in settings. 3. Remove the email address from the exclusion list. |
| Incorrect Association | 1. Review the associated records in the email activity timeline. 2. Check the contact’s email address and domain. | 1. Manually re-associate the email with the correct records. 2. Ensure the contact’s email address and domain are accurate in HubSpot. |
| Missing Attachments | 1. Attachments are not directly logged when manually logging. | 1. Upload attachments to a file hosting service or HubSpot’s file manager and include a link in the email body. |
| Tracking Issues | 1. Verify that email tracking is enabled in your HubSpot settings. 2. Ensure the recipient’s email client is not blocking tracking pixels. | 1. Enable email tracking in settings. 2. Advise recipients to enable images in their email client. |
| Connection Errors | 1. Check your internet connection. 2. Ensure your email provider is not blocking HubSpot’s access. 3. Review HubSpot’s system status for known issues. | 1. Troubleshoot your internet connection. 2. Contact your email provider to ensure HubSpot is not blocked. 3. Monitor HubSpot’s system status for updates. |
Example Scenario: Resolving Emails Not Logging Issue
You notice that emails sent from your Gmail account are not being logged in HubSpot. Here’s how to troubleshoot:
- Check Inbox Connection: Go to HubSpot settings > Integrations > Email Integrations and verify that your Gmail account is connected. If the connection is broken, click “Reconnect.”
- Verify Logging Settings: Ensure that automatic email logging is enabled in the settings.
- Check Exclusion List: Review the exclusion list to ensure your email address or domain is not accidentally included.
If these steps don’t resolve the issue, consider contacting HubSpot support for further assistance.
Preventive Measures
- Regularly Monitor: Periodically check your email logging status to identify and resolve issues early.
- Stay Updated: Keep your HubSpot Sales extension and email client up-to-date to ensure compatibility.
- Train Your Team: Provide training to your team on proper email logging procedures and troubleshooting steps.
Expert Tip: Set up a recurring task to review your HubSpot email integration settings monthly. This proactive approach can help you identify and address potential issues before they impact your data accuracy.
Troubleshooting email logging issues requires a systematic approach and attention to detail. By following these steps and implementing preventive measures, you can minimize disruptions and ensure that your email data remains accurate and complete within your HubSpot CRM, providing valuable insights for your sales and marketing efforts.
sell Tags
Article Monster
Email marketing expert sharing insights about cold outreach, deliverability, and sales growth strategies.