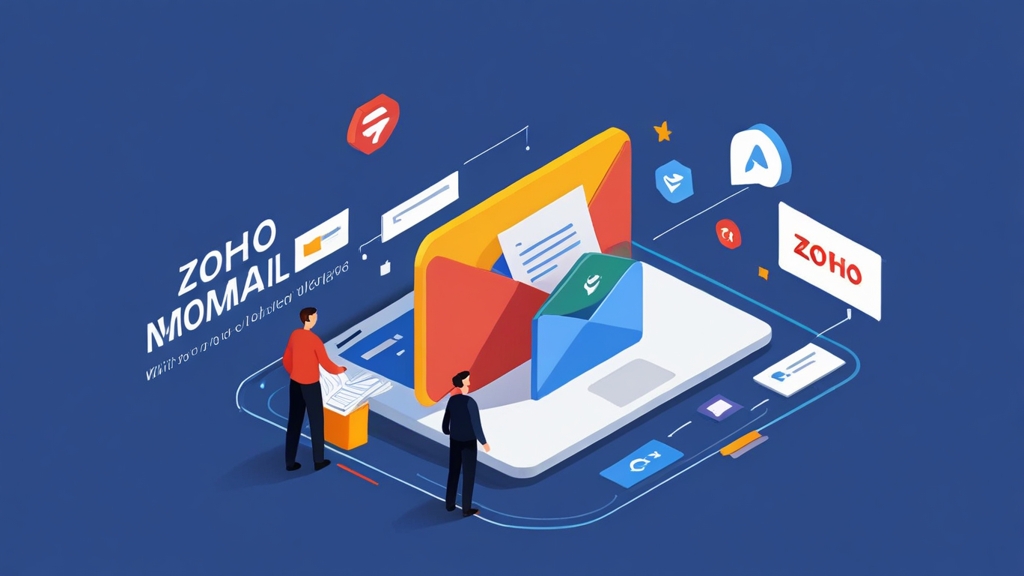
How to Log Into Zoho Mail: A Comprehensive Guide
Zoho Mail is a popular choice for businesses and individuals alike, offering a robust suite of email and collaboration tools. Whether you’re a new user or just need a refresher, this guide will provide you with detailed instructions on how to log into Zoho Mail using various methods. We’ll cover everything from the standard web login to using desktop and mobile apps, as well as troubleshooting common login issues, and optimizing email delivery to your inbox.
Table of Contents:
- Logging into Zoho Mail via Web Browser
- Logging into Zoho Mail on Mobile Apps (Android & iOS)
- Logging into Zoho Mail on Desktop Apps
- Troubleshooting Common Zoho Mail Login Issues
- Tips for Improving Zoho Mail Deliverability to Your Inbox
Logging into Zoho Mail via Web Browser
The most common way to access your Zoho Mail account is through a web browser. This method is platform-independent, meaning it works on any operating system (Windows, macOS, Linux, etc.) as long as you have a compatible browser. Let’s break down the process step-by-step.
Step-by-Step Guide to Web Browser Login
- Open your preferred web browser: This could be Chrome, Firefox, Safari, Edge, or any other modern browser.
- Navigate to the Zoho Mail website: Type www.zoho.com/mail into the address bar and press Enter.
- Locate the “Sign In” button: On the Zoho Mail homepage, you’ll typically find a prominent “Sign In” or “Login” button, usually located in the top-right corner of the page. Click on it.
- Enter your email address or mobile number: You’ll be prompted to enter the email address or mobile number associated with your Zoho Mail account.
- Enter your password: Carefully type in your password. Remember that passwords are case-sensitive, so ensure you have Caps Lock turned off if needed.
- Click the “Sign In” button: After entering your credentials, click the “Sign In” or “Login” button to access your inbox.
Example 1: Standard Login Procedure
Imagine you’re a new user with the email address `john.doe@zohomail.com`. Here’s how your login process would look:
- Open Chrome.
- Go to www.zoho.com/mail.
- Click “Sign In”.
- Enter `john.doe@zohomail.com` in the email address field.
- Enter your password (e.g., “P@sswOrd123”).
- Click “Sign In”.
If your credentials are correct, you’ll be redirected to your Zoho Mail inbox.
Example 2: Using Zoho Accounts (Single Sign-On)
Zoho utilizes a centralized accounts system. If you use other Zoho services (CRM, Docs, etc.), you might already be logged into your Zoho account. In this case:
- Open Firefox.
- Go to www.zoho.com/mail.
- If you’re already logged into your Zoho account, you might be automatically redirected to your Zoho Mail inbox without needing to enter your credentials again. If not, the login page will appear.
- If the login page appears, proceed with entering your email and password as described above.
Example 3: Remembering Your Browser
Many browsers offer the option to remember your username and password. If you choose to save your credentials, the next time you visit the Zoho Mail website, your email address and password fields might be pre-filled. While convenient, be cautious when using this feature on shared computers.
Security Tip: Always use a strong, unique password for your Zoho Mail account. Consider using a password manager to generate and store your passwords securely.
Logging into Zoho Mail on Mobile Apps (Android & iOS)
Zoho Mail offers dedicated mobile apps for both Android and iOS devices, providing a convenient way to access your email on the go. The login process is slightly different from the web browser, but still straightforward.
Step-by-Step Guide to Mobile App Login
- Download and install the Zoho Mail app: Visit the Google Play Store (for Android) or the App Store (for iOS) and search for “Zoho Mail”. Download and install the official Zoho Mail app.
- Open the Zoho Mail app: Once installed, tap the Zoho Mail app icon on your device’s home screen or app drawer to launch it.
- Choose your sign-in method: The app will typically present you with several sign-in options. These may include “Sign in with Zoho,” “Sign in with Google,” “Sign in with Apple,” or other authentication methods.
- Enter your credentials:
- If you choose “Sign in with Zoho”: Enter your Zoho Mail email address and password.
- If you choose “Sign in with Google” or “Sign in with Apple”: You’ll be redirected to the Google or Apple sign-in page to authenticate using your existing Google or Apple account credentials. Make sure the account you select is associated with your Zoho Mail account (if applicable).
- Grant necessary permissions: The app might request certain permissions, such as access to your contacts or notifications. Grant these permissions as needed to allow the app to function properly.
- Start using Zoho Mail: After successful authentication, you’ll be taken to your Zoho Mail inbox.
Example 1: Logging in with Zoho Account on Android
Let’s say you have a Zoho Mail account (`jane.doe@zohomail.com`) and you’re using an Android phone:
- Download and install the Zoho Mail app from the Google Play Store.
- Open the app.
- Tap “Sign in with Zoho”.
- Enter `jane.doe@zohomail.com` in the email address field.
- Enter your password (e.g., “SecureP@ss123”).
- Tap “Sign In”.
- Grant the app permission to access contacts (optional, but recommended for features like auto-completion).
Example 2: Logging in with Google on iOS
If your Zoho Mail account is linked to your Google account, you can use “Sign in with Google” on an iPhone:
- Download and install the Zoho Mail app from the App Store.
- Open the app.
- Tap “Sign in with Google”.
- Select your Google account (e.g., `jane.doe@gmail.com`). Make sure this Google account is linked to your Zoho Mail account.
- Follow the on-screen prompts to grant Zoho Mail access to your Google account.
Example 3: Using Touch ID/Face ID
Once you’ve logged in to the Zoho Mail app, you can enable biometric authentication (Touch ID or Face ID) for faster and more secure access in the future. The option to enable this is usually found within the app’s settings menu.
Expert Tip: Enable two-factor authentication (2FA) on your Zoho account for enhanced security. This adds an extra layer of protection, requiring a code from your phone in addition to your password.
Logging into Zoho Mail on Desktop Apps
While less common, Zoho offers desktop applications (not just a web wrapper) for accessing your email. The login process here is very similar to the web browser experience but provides the benefits of a dedicated application.
Step-by-Step Guide to Desktop App Login
- Download and Install the Zoho Mail Desktop App: Navigate to the Zoho Mail website and look for the download link for the desktop application. It’s usually located in the footer of the page or within the settings of your webmail interface. Choose the appropriate version for your operating system (Windows or macOS).
- Open the Zoho Mail App: Once installed, locate the Zoho Mail icon on your desktop or in your applications folder and launch the application.
- Enter your Credentials: The login screen will prompt you to enter your email address and password. This is the same email and password you use for the web browser version of Zoho Mail.
- Sign In: Click the “Sign In” button after entering your email address and password.
- Stay Signed In (Optional): Most desktop apps offer a “Stay Signed In” or “Remember Me” option. If you check this box, you won’t have to enter your credentials every time you open the application. Use caution when using this option on shared computers.
Example 1: Logging in on a Windows Machine
Here’s an example of logging in to the Zoho Mail desktop app on a Windows computer using the email `support@yourdomain.com`:
- Download the Zoho Mail desktop app from the Zoho website (ensure it’s the Windows version).
- Install the application.
- Open the Zoho Mail app.
- Enter `support@yourdomain.com` in the email field.
- Enter your password (e.g., a complex, unique password).
- Click “Sign In”.
- Optionally, check the “Stay Signed In” box.
Example 2: Logging in on macOS
The macOS login process is nearly identical to Windows:
- Download the macOS version of the Zoho Mail desktop app.
- Install the app by dragging the icon to the Applications folder.
- Open the Zoho Mail app from the Applications folder or Launchpad.
- Enter your Zoho Mail email address.
- Enter your password.
- Click “Sign In”.
Example 3: Managing Multiple Zoho Accounts
The desktop app usually allows you to add and manage multiple Zoho Mail accounts. This is useful if you have both personal and work email addresses within the Zoho ecosystem. The process for adding an additional account generally involves navigating to the app’s settings or preferences and selecting “Add Account.” You’ll then be prompted to enter the credentials for the new account.
Important Note: The desktop app provides a more integrated experience compared to the web browser, including features like desktop notifications for new emails. However, always keep your app updated to benefit from the latest security patches and feature improvements.
Troubleshooting Common Zoho Mail Login Issues
Even with a straightforward process, login issues can occur. Here’s a comprehensive guide to troubleshooting common Zoho Mail login problems.
Problem 1: Incorrect Email Address or Password
This is the most common login issue. Double-check that you’re entering your email address and password correctly. Remember that passwords are case-sensitive.
- Solution: Carefully re-type your email address and password. Ensure Caps Lock is off. If you’re still unable to log in, try resetting your password.
- Example: Instead of `john.doe@zohomail.com`, you might accidentally type `john.doe@zohomail.con`. A single typo can prevent login.
Problem 2: Forgotten Password
If you’ve forgotten your password, you can reset it through the Zoho Mail website.
- Solution:
- Go to the Zoho Mail login page.
- Click the “Forgot Password?” link (usually located below the password field).
- Enter your email address or mobile number associated with your Zoho account.
- Follow the instructions sent to your recovery email address or mobile number to reset your password. This typically involves clicking a link or entering a verification code.
- Create a new, strong password.
- Example: You receive a password reset email at your recovery email address (`recovery@example.com`) with a link that expires in 15 minutes. Click the link promptly and follow the instructions.
Problem 3: Account Lockout
Zoho Mail might temporarily lock your account if there are too many failed login attempts.
- Solution: Wait for a certain period (usually 15-30 minutes) and try again. Avoid repeatedly attempting to log in with incorrect credentials, as this will only prolong the lockout period. If you still can’t log in after waiting, contact Zoho Mail support.
- Example: After five failed login attempts, you see a message saying “Your account is temporarily locked due to too many failed login attempts. Please try again after 30 minutes.”
Problem 4: Two-Factor Authentication (2FA) Issues
If you have 2FA enabled, you’ll need to enter a verification code from your authenticator app or a backup code.
- Solution:
- Check your authenticator app: Open your authenticator app (e.g., Google Authenticator, Authy) and enter the current verification code for your Zoho account.
- Use a backup code: If you’ve lost access to your authenticator app, use one of your backup codes that you saved when you enabled 2FA.
- Contact Zoho Mail support: If you’ve lost both your authenticator app and your backup codes, you’ll need to contact Zoho Mail support to regain access to your account. This will likely involve providing proof of ownership.
- Example: You lost your phone with Google Authenticator installed. You use one of your backup codes (e.g., `ABC-123-DEF-456`) to log in. After logging in, you should immediately disable the old 2FA setup and enable it again with your new phone.
Problem 5: Browser Issues (Cookies, Cache)
Sometimes, browser issues like corrupted cookies or cached data can interfere with the login process.
- Solution:
- Clear your browser’s cookies and cache: The process for clearing cookies and cache varies depending on your browser. Generally, you can find these options in your browser’s settings or history menu.
- Try a different browser: If clearing cookies and cache doesn’t work, try logging in using a different web browser.
- Disable browser extensions: Some browser extensions can interfere with website functionality. Try disabling your extensions one by one to see if any of them are causing the login issue.
- Example: In Chrome, go to `chrome://settings/clearBrowserData`, select “Cookies and other site data” and “Cached images and files”, and click “Clear data”.
Problem 6: Network Connectivity Issues
A stable internet connection is essential for logging into Zoho Mail.
- Solution: Ensure you have a working internet connection. Try restarting your modem or router. If you’re using Wi-Fi, try switching to a wired connection or connecting to a different Wi-Fi network.
- Example: You see a “Connection Timed Out” error message. Check your Wi-Fi connection and try restarting your router.
Problem 7: Zoho Mail Server Issues
In rare cases, the Zoho Mail servers might be experiencing temporary outages or maintenance.
- Solution: Check the Zoho Mail status page or social media channels for any reported outages. If there’s a known issue, wait for it to be resolved before attempting to log in again.
- Example: You see a message on the Zoho Mail status page saying “We are currently experiencing a service disruption. Our engineers are working to resolve the issue.”
Quote: “The key to effective troubleshooting is methodical elimination. Start with the simplest solutions and work your way up to more complex ones.” – Tech Support Proverb
Tips for Improving Zoho Mail Deliverability to Your Inbox
Logging in is only the first step. Ensuring that your emails actually reach your recipients’ inboxes is crucial. Here are some tips to improve Zoho Mail deliverability.
Tip 1: Authenticate Your Domain
Domain authentication verifies that you are who you say you are, preventing spammers from spoofing your email address. This involves setting up SPF, DKIM, and DMARC records in your domain’s DNS settings.
- SPF (Sender Policy Framework): Specifies which mail servers are authorized to send emails on behalf of your domain.
- DKIM (DomainKeys Identified Mail): Adds a digital signature to your emails, allowing recipient mail servers to verify that the email was actually sent from your domain and hasn’t been tampered with.
- DMARC (Domain-based Message Authentication, Reporting & Conformance): Builds upon SPF and DKIM, allowing you to specify how recipient mail servers should handle emails that fail authentication checks. It also provides reporting mechanisms to help you monitor your email authentication performance.
Example:
| Record Type | Name/Host | Value/Content |
|---|---|---|
| TXT | @ (or your domain) | v=spf1 include:zoho.com -all |
| TXT | zoho._domainkey | v=DKIM1; k=rsa; p=MIGfMA0GCSqGSIb3DQEBAQUAA4GNADCBiQKBgQDspkhEwPJI2hFMDQ6Q1Y2uiwtybd5FwDwiE3y47Tq/d54KxU8cW+M49/h6D4Nq2j2W+U5W6w9c8L+O27z81J898j898j898j898j898j898j898j898j898j898j898j898j898j898j898j898j898j898j898j898j898j898j898j898j898j898j898j898j898j898j898j898j898j898j898j898j898j898j898j898j898j898j898j898j898j898j898j898j898j898j898j898j898j898j898j898j898j898j898j898j898j898j898j898j898j898j898j898j898j898j898j898j898j898j898j898j898j898j898j898j898j898j898j898j898j898j898j898j898j898j898j898j898j898j898j898j898j898j898j898j898j898j898j898j898j898j898j898j898j898j898j898j898j898j898j898j898j898j898j898j898j898j898j898j898j898j898j898j898j898j898j898j898j898j898j898j898j898j898j898j898j898j898j898j898j898j898j898j898j898j898j898j898j898j898j898j898j898j898j898j898j898j898j898j898j898j898j898j898j898j898j898j898j898j898j898j898j898j898j898j898j898j898j898j898j898j898j898j898j898j898j898j898j898j898j898j898j898j898j898j898j898j898j898j898j898j898j898j898j898j898j898j898j898j898j898j898j898j898j898j898j898j898j898j898j898j898j898j898j898j898j898j898j898j898j898j898j898j898j898j898j898j898j898j898j898j898j898j898j898j898j898j898j898j898j898j898j898j898j898j898j898j898j898j898j898j898j898j898j898j898j898j898j898j898j898j898j898j898j898j898j898j898j898j898j898j898j898j898j898j898j898j898j898j898j898j898j898j898j898j898j898j898j898j898j898j898j898j898j898j898j898j898j898j898j898j898j898j898j898j898j898j898j898j898j898j898j898j898j898j898j898j898j898j898j898j898j898j898j898j898j898j898j898j898j898j898j898j898j898j898j898j898j898j898j898j898j898j898j898j898j898j898j898j898j898j898j898j898j898j898j898j898j898j898j898j898j898j898j898j898j898j898j898j898j898j898j898j898j898j898j898j898j898j898j898j898j898j898j898j898j898j898j898j898j898j898j898j898j898j898j898j898j898j898j898j898j898j898j898j898j898j898j898j898j898j898j898j898j898j898j898j898j898j898j898j898j898j898j898j898j898j898j898j898j898j898j898j898j898j898j898j898j898j898j898j898j898j898j898j898j898j898j898j898j898j898j898j898j898j898j898j898j898j898j898j898j898j898j898j898j898j898j898j898j898j898j898j898j898j898j898j898j898j898j898j898j898j898j898j898j898j898j898j898j898j898j898j898j898j898j898j898j898j898j898j898j898j898j898j898j898j898j898j898j898j898j898j898j898j898j898j898j898j898j898j898j898j898j898j898j898j898j898j898j898j898j898j898j898j898j898j898j898j898j898j898j898j898j898j898j898j898j898j898j898j898j898j898j898j898j898j898j898j898j898j898j898j898j898j898j898j898j898j898j898j898j898j898j898j898j898j898j898j898j898j898j898j898j898j898j898j898j898j898j898j898j898j898j898j898j898j898j898j898j898j898j898j898j898j898j898j898j898j898j898j898j898j898j898j898j898j898j898j898j898j898j898j898j898j898j898j898j898j898j898j898j898j898j898j898j898j898j898j898j898j898j898j898j898j898j898j898j898j898j898j898j898j898j898j898j898j898j898j898j898j898j898j898j898j898j898j898j898j898j898j898j898j898j898j898j898j898j898j898j898j898j898j898j898j898j898j898j898j898j898j898j898j898j898j898j898j898j898j898j898j898j898j898j898j898j898j898j898j898j898j898j898j898j898j898j898j898j898j898j898j898j898j
sell Tags
person
Article MonsterEmail marketing expert sharing insights about cold outreach, deliverability, and sales growth strategies. Ready to Boost Your Outreach?Try Postigo - Professional email outreach platform with AI personalization |