How to Use BCC in Gmail for Optimal Email Delivery
Blind Carbon Copy (BCC) is a powerful feature in Gmail that allows you to send emails to multiple recipients without revealing their addresses to each other. This is crucial for maintaining privacy, preventing reply-all storms, and ensuring better email deliverability. This article will guide you through the best practices of using BCC in Gmail to optimize your email campaigns and communications, focusing on strategies to improve inbox placement and avoid spam filters.
Table of Contents
- Understanding BCC and Its Importance
- Using BCC Effectively in Gmail
- BCC and Email Deliverability: Best Practices
- Troubleshooting Common BCC Issues
Understanding BCC and Its Importance

- Sending a newsletter or announcement to a large customer base: Protect the privacy of your subscribers and avoid reply-all storms.
- Emailing a group of people who are not directly related to each other: For example, informing multiple departments about a general policy update.
- Forwarding an email to a group of people where the original recipients’ addresses should not be disclosed: For example, forwarding a support request to multiple technicians.
- Sending an email to a competitor’s client: if you need to send information without revealing the other client’s information.
- Open Gmail and click “Compose”.
- In the “To” field, enter your own email address (e.g., newsletter@yourcompany.com) or leave it blank.
- Click on the “Bcc” link/button that appears on the right. If you don’t see it, it might be hidden behind an arrow or link that says “Show Bcc”.
- Enter all of your customer email addresses in the “Bcc” field, separated by commas. You can also copy and paste them from a spreadsheet.
- Write your newsletter content and click “Send”.
- Open the email from the customer.
- Click “Forward”.
- In the “To” field, enter the email address of the technician most likely to handle the request.
- Click the “Bcc” link/button.
- Enter the email addresses of any other technicians who might be able to assist in the “Bcc” field.
- Add a brief note to the technicians explaining the situation.
- Click “Send”.
Using BCC Effectively in Gmail

- Open Gmail and Compose a New Email: Click the “Compose” button in the upper left corner of your Gmail interface.
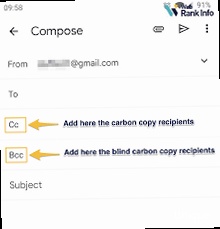
- Find the BCC Field: Below the “To” and “Cc” fields, you should see a “Bcc” link or button. If you don’t see it, look for a small arrow or a link that says “Show Bcc” or “Add Bcc”. Click on it to reveal the BCC field.
- Enter Recipient Addresses in the BCC Field: Type or paste the email addresses of the recipients you want to include in the BCC field. Separate multiple addresses with commas.
- Add Your Own Address to the “To” Field (Optional but Recommended): While not strictly necessary, it’s good practice to add your own email address to the “To” field. This ensures that you receive a copy of the email and can easily track it in your “Sent” folder. Alternatively, you can leave it blank. Some email systems might filter emails with an empty “To” field as spam.
- Compose Your Email: Write your email subject and message body as usual.
- Send Your Email: Click the “Send” button to send your email.
- Use a Spreadsheet to Manage Your List: Keep your email list in a spreadsheet (e.g., Google Sheets, Microsoft Excel) to easily copy and paste addresses into the BCC field.
- Break Up Large Lists: If you have a very large list, consider dividing it into smaller segments and sending the email in batches. This helps to stay within Gmail’s sending limits and reduces the risk of being flagged as a spammer. For example, if Gmail’s sending limit is 500 emails per day, you could send 10 batches of 50 emails each.
- Consider Using an Email Marketing Service: For truly large-scale email campaigns, an email marketing service (e.g., Mailchimp, Sendinblue, Constant Contact) is the best option. These services are designed to handle bulk emails and offer features like list management, segmentation, A/B testing, and analytics.
- Divide the List: Divide the 1000 email addresses into 5 batches of 200 emails each.
- Create Separate Emails: Create five separate emails in Gmail.
- Populate the BCC Field: For each email, copy and paste one batch of 200 email addresses into the BCC field.
- Send the Emails: Send each of the five emails separately. Wait a reasonable amount of time (e.g., 30 minutes to an hour) between sending each batch to avoid triggering spam filters.
BCC and Email Deliverability: Best Practices
While BCC is primarily a privacy feature, it indirectly affects your email deliverability. Email deliverability refers to the ability of your emails to reach the intended recipients’ inboxes, rather than being filtered into spam folders or blocked altogether. Here’s how BCC impacts deliverability and what best practices to follow: How BCC Can Affect Deliverability- Avoiding Spam Flags: As mentioned earlier, placing a large number of recipients in the “To” or “CC” fields can trigger spam filters. Email providers may interpret this as a sign of unsolicited mass emailing. BCC helps to avoid this by hiding the recipient list.
- Maintaining a Clean Sender Reputation: A good sender reputation is crucial for email deliverability. Factors that contribute to sender reputation include bounce rates, spam complaints, and engagement rates (e.g., opens, clicks). Using BCC responsibly can help maintain a clean sender reputation by preventing spam complaints and ensuring that your emails are well-received.
- Complying with Anti-Spam Laws: Anti-spam laws like CAN-SPAM Act require you to provide recipients with a clear and easy way to unsubscribe from your emails. When using BCC for marketing purposes, it’s essential to include an unsubscribe link in your email and to promptly remove anyone who requests to be unsubscribed. Failing to do so can result in penalties and damage your sender reputation.
- Authenticate Your Email: Implement email authentication protocols like SPF (Sender Policy Framework), DKIM (DomainKeys Identified Mail), and DMARC (Domain-based Message Authentication, Reporting & Conformance). These protocols help email providers verify that your emails are actually coming from you and not from a spammer spoofing your domain. This is perhaps the MOST important aspect of ensuring deliverability.
- Maintain a Clean Email List: Regularly clean your email list by removing invalid or inactive addresses. A high bounce rate (the percentage of emails that fail to be delivered) can negatively impact your sender reputation.
- Provide an Unsubscribe Option: If you are sending emails for marketing purposes, always include a clear and easy-to-find unsubscribe link in your email. Respect unsubscribe requests promptly.
- Segment Your Email List: Segment your email list based on recipient interests, demographics, or engagement levels. Sending targeted emails to specific segments can improve engagement rates and reduce the likelihood of spam complaints.
- Monitor Your Sender Reputation: Regularly monitor your sender reputation using tools like Google Postmaster Tools or Sender Score. This will help you identify any issues that could be affecting your deliverability.
- Warm Up Your IP Address: If you are using a new IP address to send emails, gradually increase your sending volume over time to establish a positive sender reputation. This is known as “warming up” your IP address.
- Log in to Your DNS Provider: Log in to the website of your domain registrar or DNS hosting provider (e.g., GoDaddy, Namecheap, Cloudflare).
- Find the DNS Settings: Locate the DNS settings for your domain. This is often found in a section called “DNS Management” or “Zone Editor”.
- Add a TXT Record: Add a new TXT record with the following values:
Name/Host: @ or yourdomain.com
Type: TXT
Value: v=spf1 include:_spf.google.com ~all- Name/Host: This is usually “@” or your domain name (e.g., “yourdomain.com”).
- Type: Select “TXT” as the record type.
- Value: This is the SPF record itself. The `v=spf1` indicates the SPF version. `include:_spf.google.com` specifies that you are using Google’s mail servers to send emails. `~all` indicates that any email not sent from the specified servers should be treated as a soft fail (i.e., accepted but marked as suspicious). If you use other email sending services, you need to include their SPF records as well (e.g., `include:sendgrid.net`).
- Save the Record: Save the new TXT record. It may take some time for the changes to propagate across the internet.
- Access Google Postmaster Tools: Go to https://postmaster.google.com/ and sign in with your Google account.
- Add Your Domain: Add your sending domain to Postmaster Tools and verify ownership by adding a DNS record.
- Review the Data: Once your domain is verified, you can access data on your sender reputation, spam rate, feedback loop, and authentication. Pay attention to the following metrics:
| Metric | Description | What to Look For |
|---|---|---|
| Spam Rate | The percentage of your emails that are marked as spam by Gmail users. | Keep this below 0.3%. A high spam rate indicates that your emails are not well-received. |
| Domain Reputation | Gmail’s assessment of your domain’s reputation. | Aim for a “High” or “Good” reputation. A “Low” or “Bad” reputation indicates serious deliverability issues. |
| IP Reputation | Gmail’s assessment of your sending IP address’s reputation. | Similar to domain reputation, aim for a “High” or “Good” reputation. |
Troubleshooting Common BCC Issues
Even when following best practices, you might encounter issues when using BCC in Gmail. Here’s a troubleshooting guide to address common problems: Issue 1: Emails Sent via BCC Going to Spam- Possible Causes:
- Poor sender reputation.
- Lack of email authentication (SPF, DKIM, DMARC).
- High spam complaint rate.
- Content triggers spam filters (e.g., excessive use of exclamation points, spammy keywords).
- Sending to invalid or inactive email addresses.
- Troubleshooting Steps:
- Go to MXToolbox: Open your web browser and go to https://mxtoolbox.com/SuperTool.aspx.
- Enter Your Domain: Enter your domain name in the search box and select “SPF Record Lookup” from the dropdown menu.
- Run the Test: Click the “SuperTool” button to run the test.
- Review the Results: MXToolbox will display your SPF record (if any) and any errors or warnings.
- Possible Causes:
- Emails being filtered as spam.
- Recipient’s email server blocking your emails.
- Recipient’s inbox being full.
- Incorrect email addresses.
- Gmail sending limits being exceeded.
- Troubleshooting Steps:
- Possible Causes:
- Exceeding Gmail’s sending limits (number of recipients per email or number of emails per day).
- Gmail detecting suspicious activity (e.g., sending a large number of emails to new recipients).
- Troubleshooting Steps:
person
Article Monster
Email marketing expert sharing insights about cold outreach, deliverability, and sales growth strategies.