Mastering HubSpot Free Email Tracking: A Practical Guide
HubSpot’s free CRM offers powerful email tracking capabilities, enabling you to gain invaluable insights into how your contacts engage with your emails. This guide provides a practical, step-by-step approach to effectively utilize HubSpot’s free email tracking features. We’ll explore setting up email tracking, interpreting the data, and using that information to improve your email marketing efforts and sales strategies.
This article focuses on the free features available and how to maximize their usefulness. We will cover essential areas like integrating HubSpot with your email client, understanding email open and click tracking, leveraging contact activity, and utilizing snippets and templates for efficient, trackable communication. Let’s dive in!
Table of Contents
- Setting Up HubSpot Email Tracking
- Understanding Email Open and Click Tracking
- Leveraging Contact Activity for Deeper Insights
- Using Snippets and Templates for Efficient Communication
Setting Up HubSpot Email Tracking

Before you can track emails with HubSpot’s free CRM, you need to connect your email account. This integration allows HubSpot to monitor email activity directly from your inbox. The process varies slightly depending on the email provider you use, but the general steps remain the same.
Connecting Your Email Account
HubSpot supports integration with major email providers like Gmail, Outlook, and Office 365. Let’s look at the steps to connect a Gmail account, which is a common use case.
- Navigate to your HubSpot account.
- Click the settings icon in the main navigation bar.
- In the left sidebar menu, navigate to Integrations > Email Integrations.
- Click Connect inbox.
- Select Gmail and follow the prompts to sign in to your Google account and grant HubSpot the necessary permissions.
For Outlook and Office 365, the process is similar. Choose the respective option in the integration settings and follow the on-screen instructions. You may need to enter your email address and password and grant HubSpot access to your account.
Example: Let’s say your email is `john.doe@example.com`. When connecting your Gmail account, you’ll be redirected to Google’s sign-in page. After entering your credentials and granting HubSpot permissions (access to send emails, read email content, and manage your inbox), HubSpot will establish the connection.
Enabling Email Tracking
Once your email account is connected, ensure that email tracking is enabled. This feature allows HubSpot to monitor when contacts open your emails and click on links within them.
- In your HubSpot account, click the settings icon .
- In the left sidebar menu, navigate to Objects > Activities.
- Under the Tracking tab, make sure the Track emails opened and clicked toggle is switched on.
Example: If the “Track emails opened and clicked” toggle is off, HubSpot will not be able to register when your contacts open your emails or click on links, rendering email tracking ineffective. Always ensure this setting is enabled.
Installing the HubSpot Sales Extension
To track emails directly from your Gmail or Outlook inbox, install the HubSpot Sales extension. This extension adds a HubSpot icon to your email composition window, allowing you to track emails as you send them.
- Navigate to the HubSpot Sales Chrome extension page (search for “HubSpot Sales Chrome extension” on Google).
- Click Add to Chrome.
- Follow the prompts to install the extension.
- Once installed, you may need to log in to your HubSpot account through the extension.
The installation process for the Outlook add-in is similar. Search for the “HubSpot Sales Outlook add-in” and follow the provided instructions. This will add a HubSpot panel within your Outlook interface.
Example: After installing the Chrome extension, when composing a new email in Gmail, you’ll see a “Log in HubSpot” button or a small HubSpot sprocket icon. Clicking this will prompt you to log into your HubSpot account, linking your Gmail to your HubSpot CRM and enabling tracking. Make sure the “Track email” checkbox is selected before sending your emails.
Expert Tip: After connecting your email, send yourself a test email to confirm that tracking is working correctly. Check your HubSpot activity feed to see if the email open and click events are being logged. This simple test can save you from sending untracked emails unknowingly.
Understanding Email Open and Click Tracking

Once you’ve set up email tracking, the next step is understanding the data HubSpot provides. HubSpot tracks two primary metrics: email opens and link clicks. These metrics offer valuable insights into your contacts’ engagement with your emails.
Interpreting Email Open Data
An email open is recorded when a recipient opens your email and their email client downloads the tracking pixel embedded in the email. This provides a basic indication of whether your subject line and sender name were compelling enough to prompt the recipient to open the email.
Example: If you send an email to 100 contacts and 30 of them open it, your email open rate is 30%. A higher open rate generally indicates a more engaging subject line and a recognizable sender name.
However, keep in mind that email open rates can be affected by several factors, including:
- Image blocking: Some email clients block images by default, preventing the tracking pixel from loading and resulting in an unrecorded open.
- Preview panes: Some email clients’ preview panes may trigger an open without the recipient actually reading the email.
- Mobile vs. desktop: Open rates can vary depending on whether recipients are opening emails on mobile devices or desktops.
Example: If a contact uses an email client that blocks images by default (e.g., certain versions of Outlook), their email open might not be tracked even if they read the email. This is why open rates should be considered alongside other metrics.
Analyzing Link Click Data
Link clicks are recorded when a recipient clicks on a hyperlink within your email. This metric is a stronger indicator of engagement than email opens, as it suggests that the recipient found the content in your email interesting enough to click through to a linked resource.
Example: If you include a link to your website in an email and 10 out of 100 recipients click on that link, your click-through rate (CTR) is 10%. A higher CTR indicates that your email content is relevant and compelling to your audience.
HubSpot tracks which links were clicked and how many times each link was clicked. This information helps you understand which content resonates most with your audience.
Example: Suppose you send an email containing two links: one to a product page and another to a blog post. If the product page link receives significantly more clicks than the blog post link, it suggests that your audience is more interested in your products than your blog content. You can use this information to tailor your future email campaigns.
Accessing Email Tracking Data in HubSpot
HubSpot provides several ways to access email tracking data:
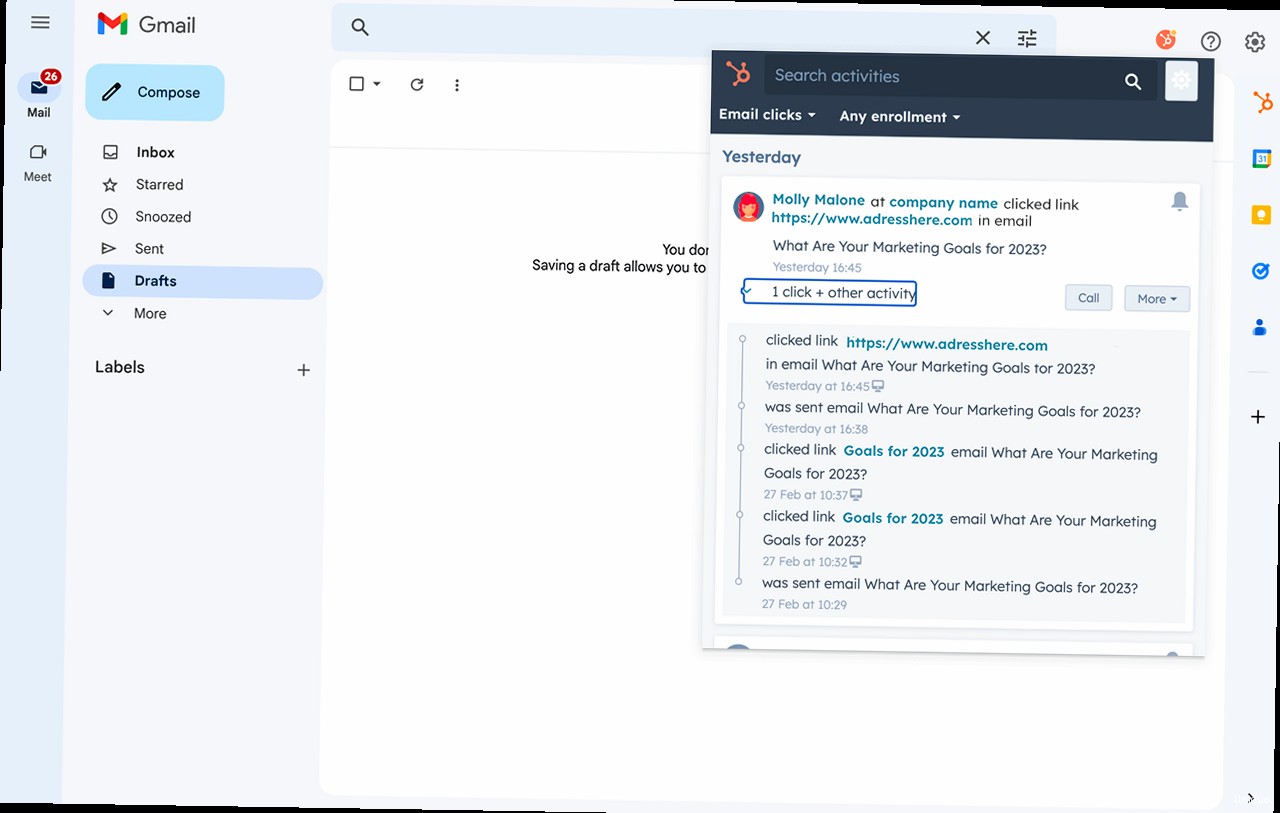
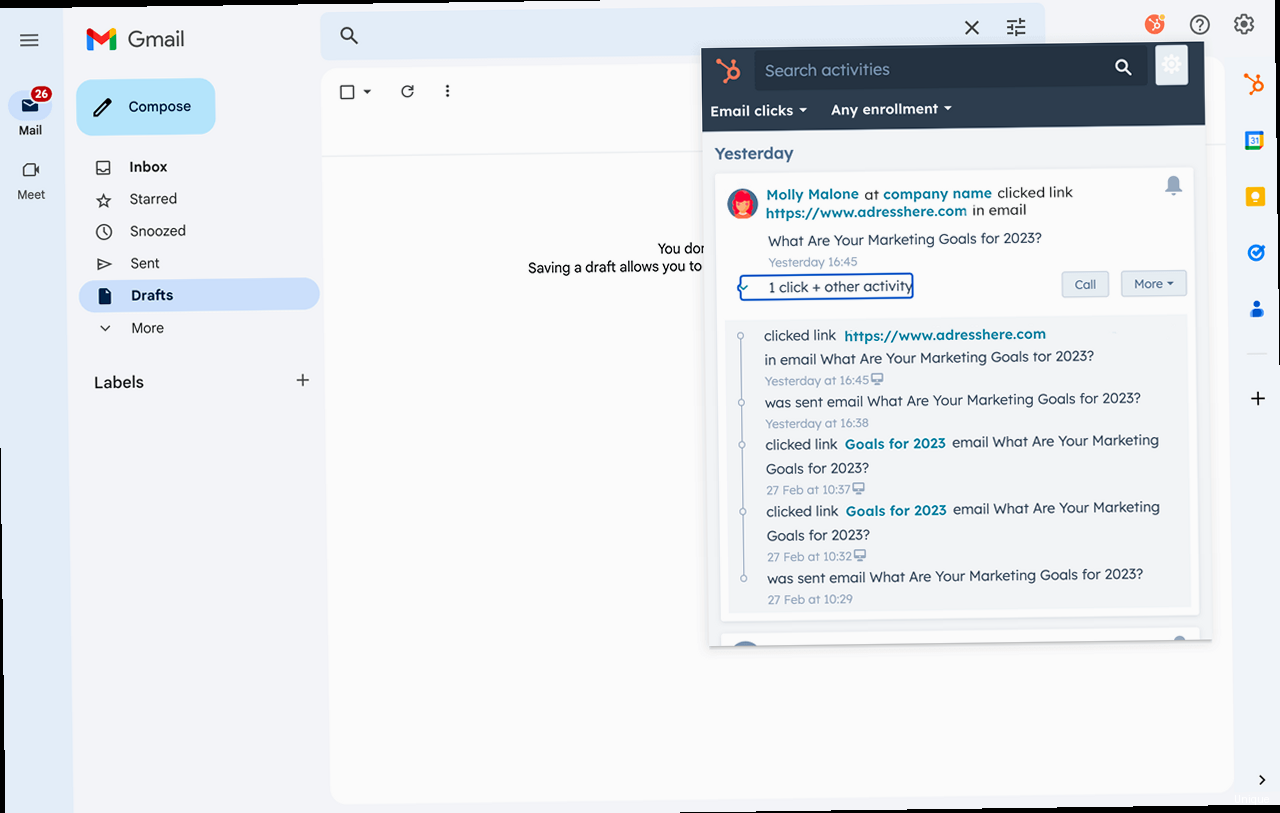
- Contact Records: View individual email activity for each contact on their contact record. This includes a timeline of emails sent, opens, and clicks.
- Activity Feed: Monitor recent email activity across all your contacts in the activity feed.
- Reports: Create custom reports to analyze email performance trends over time. (Note: Advanced reporting features may require a paid HubSpot subscription).
Example: To view the email activity for a specific contact, navigate to Contacts > Contacts, search for the contact, and click on their name. On the contact record, scroll down to the Timeline section to see a chronological list of their interactions, including email opens and clicks. Hovering over an email activity will show the specific time the email was opened or the link was clicked.
Expert Tip: Don’t rely solely on open rates. Focus on click-through rates (CTR) as a more reliable indicator of engagement. A high open rate with a low CTR might suggest that your subject line is misleading or that your email content doesn’t deliver on the promise of the subject line. Also, A/B test your subject lines to optimize open rates.
Leveraging Contact Activity for Deeper Insights
HubSpot’s value extends beyond simple email open and click tracking. By combining email activity with other contact interactions, you gain a holistic view of your contacts’ behavior and preferences. This comprehensive understanding enables you to personalize your communication and tailor your sales efforts for maximum impact.
Understanding the Contact Timeline
The contact timeline is a chronological record of every interaction a contact has had with your business, including email opens and clicks, website page views, form submissions, meeting bookings, and more. This timeline provides valuable context for understanding a contact’s level of engagement and their stage in the buying process.
Example: Imagine a contact opens an email containing a link to a product demo video, then clicks on the link and watches the video. Later, they visit your pricing page. This sequence of events suggests that the contact is highly interested in your product and is likely evaluating their options. You can use this information to proactively reach out to the contact with a personalized offer or answer any questions they may have.
Identifying Hot Leads
By analyzing contact activity, you can identify hot leads – contacts who are actively engaging with your content and showing strong buying signals. These leads are more likely to convert into customers and should be prioritized by your sales team.
Here are some indicators of a hot lead:
- Frequent email opens and clicks
- Visits to key website pages (e.g., pricing page, product pages, case studies)
- Form submissions (e.g., requesting a demo, downloading an ebook)
- Engagement with sales-related content (e.g., watching a demo video, reading a case study)
- Direct interaction with sales representatives
Example: A contact who has opened multiple emails, clicked on links to your pricing page and product demos, and downloaded a case study is a strong candidate for a hot lead. Your sales team should reach out to this contact promptly to offer assistance and answer any questions they may have.
Personalizing Communication Based on Activity
The insights you gain from contact activity allow you to personalize your communication and deliver more relevant content to each contact. This increases engagement and improves your chances of converting leads into customers.
Example: If a contact has repeatedly viewed a specific product page on your website but hasn’t yet made a purchase, you can send them a personalized email highlighting the benefits of that product and offering a special discount. This targeted approach is more likely to resonate with the contact than a generic marketing email.
Example: If a contact downloaded an ebook on a specific topic, you can enroll them in a targeted email nurture sequence that delivers additional content related to that topic. This helps to further educate the contact and build trust, increasing the likelihood of a future purchase.
Expert Quote: “Marketing is no longer about interruption, but about delivering value at just the right moment.” – Seth Godin. Use contact activity data to understand when and how to deliver the most relevant and valuable content to your contacts.
Using Snippets and Templates for Efficient Communication
HubSpot’s free CRM offers snippets and templates to streamline your email communication and ensure consistent messaging. These tools not only save time but also allow you to track the performance of your most frequently used content.
Creating and Using Snippets
Snippets are reusable text blocks that you can quickly insert into emails, notes, and chat conversations. They are ideal for answering common questions, providing standard information, or delivering frequently used greetings and closings.
- In your HubSpot account, navigate to Conversations > Snippets.
- Click Create snippet.
- Give your snippet a name (e.g., “Shipping Information”).
- Enter the text you want to reuse (e.g., “Our standard shipping time is 3-5 business days. You will receive a tracking number once your order has shipped.”).
- Click Save.
To use a snippet in an email:
- When composing an email in HubSpot or through the HubSpot Sales extension, click the Snippets icon.
- Search for the snippet you want to use.
- Click the snippet to insert it into your email.
Example: Create a snippet for answering common pricing inquiries. The snippet could say: “Thank you for your interest in our pricing. Our basic plan starts at $X per month, and our premium plan starts at $Y per month. Please visit [link to pricing page] for detailed information.”
Creating and Using Email Templates
Email templates are pre-designed email structures that you can use to quickly create consistent and professional-looking emails. They are useful for sending follow-up emails, introductory emails, or responding to common inquiries.
- In your HubSpot account, navigate to Conversations > Templates.
- Click Create template.
- Give your template a name (e.g., “Follow-up Email After Demo”).
- Write the body of your email, including a subject line. You can use personalization tokens to automatically insert contact information (e.g., first name, company name).
- Click Save template.
To use an email template:
- When composing an email in HubSpot or through the HubSpot Sales extension, click the Templates icon.
- Search for the template you want to use.
- Click the template to load it into your email.
- Customize the email as needed and send it.
Example: Create a template for following up with leads after a product demo. The template could include a personalized greeting, a summary of the demo, and a call to action. The subject line might be “Following Up After Your [Product Name] Demo”.
Example: Use personalization tokens to address recipients by their first name. In the template, you might include the line “Hi {{contact.firstname}},” which HubSpot will automatically populate with the contact’s first name from your CRM.
Tracking Template Performance
HubSpot allows you to track the performance of your email templates, providing insights into which templates are most effective. This data helps you optimize your templates for better results.
- In your HubSpot account, navigate to Conversations > Templates.
- You will see a list of your templates, along with metrics such as opens, clicks, and replies.
- Click on a template to view detailed performance data, including a breakdown of opens and clicks by recipient.
Example: By tracking the performance of your follow-up email template, you can see how many recipients opened the email, clicked on the call-to-action, and ultimately replied. If the template has a low open rate, you might need to revise the subject line. If the click-through rate is low, you might need to improve the body of the email or the call-to-action.
Comparison Table: Snippets vs. Templates
| Feature | Snippets | Templates |
|---|---|---|
| Purpose | Reusable text blocks for quick insertion. | Pre-designed email structures for consistent communication. |
| Content | Short, generic phrases or sentences. | Full email bodies, including subject lines and formatting. |
| Use Cases | Answering common questions, providing standard information. | Follow-up emails, introductory emails, responding to common inquiries. |
| Tracking | Limited tracking. | Detailed tracking of opens, clicks, and replies. |
External Link: For more information on email best practices, refer to HubSpot’s Email Marketing Guide.
sell Tags
Article Monster
Email marketing expert sharing insights about cold outreach, deliverability, and sales growth strategies.