How to Start Clover from Seed?
If you’re thinking about adding clover to your garden or lawn, growing it from seed is a cost-effective and rewarding way to do so. Clover is known for its ability to fix nitrogen in the soil, making it a valuable addition to any planting area. In this article, we’ll go over the steps to help you successfully start clover from seed.
Step 1: Choosing the Right Clover Seed
Before you start planting clover seeds, it’s important to choose the right type of clover for your needs. There are many different varieties of clover, each with its own characteristics and benefits. Common types of clover include white clover, red clover, and crimson clover. Consider factors such as the climate in your area, the type of soil you have, and the purpose of planting clover when selecting the seed.
Step 2: Preparing the Soil
Once you have selected the clover seed, it’s time to prepare the soil for planting. Clover thrives in well-drained soil with a pH between 6.0 and 7.0. Start by removing any weeds or debris from the planting area. Loosen the soil with a garden fork or tiller to a depth of about 6 inches. If your soil is compacted, consider adding some organic matter such as compost to improve its texture and drainage.
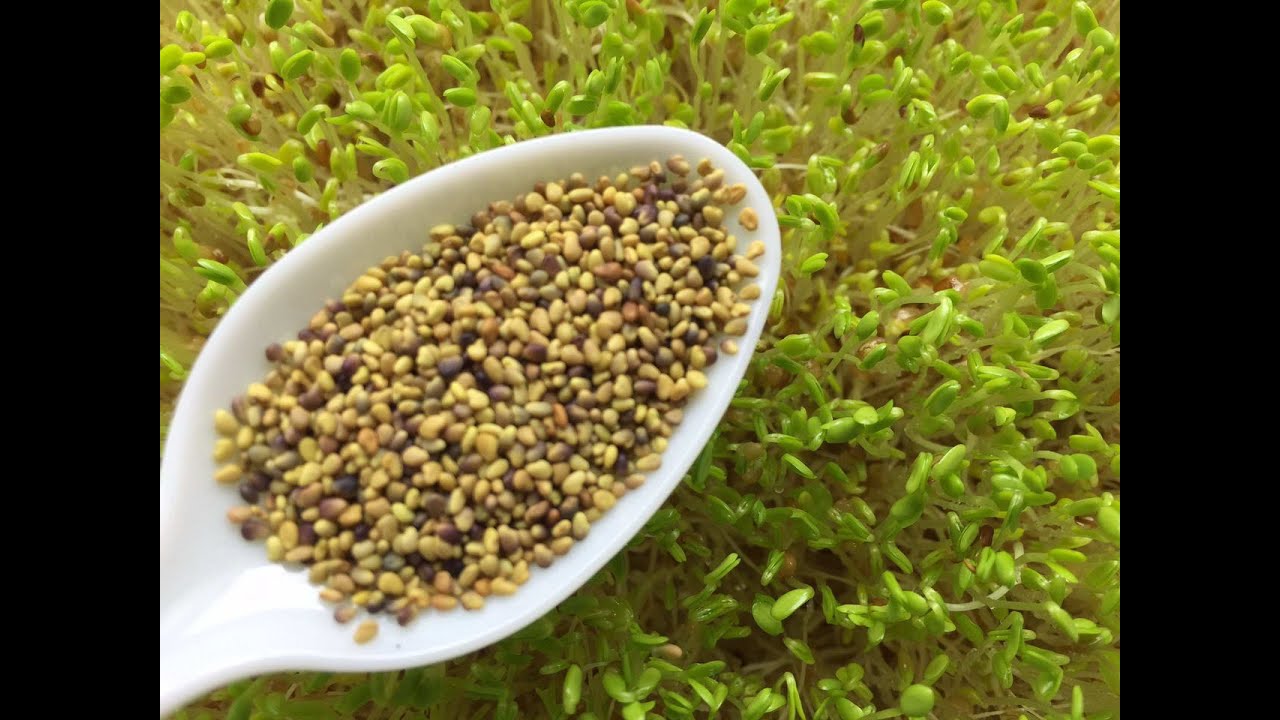
Step 3: Planting Clover Seeds
Now it’s time to plant the clover seeds. Scatter the seeds evenly over the prepared soil, taking care not to plant them too deeply. Clover seeds need light to germinate, so only cover them with a thin layer of soil. Water the seeds gently to moisten the soil, and keep it consistently moist until the seedlings emerge.
Step 4: Caring for Clover Seedlings
Once the clover seedlings have emerged, it’s important to care for them properly to ensure healthy growth. Water the seedlings regularly, especially during dry spells. Avoid overwatering, as this can lead to root rot. If weeds start to appear, hand-pull them to prevent competition for nutrients and sunlight. Fertilize the clover plants with a balanced, organic fertilizer to promote strong growth.
Step 5: Harvesting Clover
Depending on the type of clover you have planted, you can harvest it for various purposes. White clover is a popular choice for lawns and ground cover, while red clover is often used as a green manure or livestock forage. Crimson clover is a great choice for adding nitrogen to the soil and attracting beneficial insects to the garden. Harvest the clover when it is in full bloom for the best results.
Step 6: Maintaining Clover Plants
To ensure the longevity of your clover plants, it’s important to maintain them properly. Clover is a perennial plant that can benefit from an occasional mowing to keep it looking tidy and encourage new growth. Avoid using herbicides on clover, as these chemicals can harm the plant and reduce its ability to fix nitrogen in the soil. Consider overseeding clover every few years to keep your planting area lush and healthy.
Conclusion
Starting clover from seed is a simple and rewarding process that can benefit your garden or lawn in many ways. By choosing the right seed, preparing the soil properly, and caring for the seedlings diligently, you can enjoy the many benefits of this versatile plant. Whether you’re looking to add nitrogen to your soil, attract pollinators, or create a lush ground cover, clover is a great choice for any planting area.