
How to Set Up SPF, DKIM, and DMARC Records
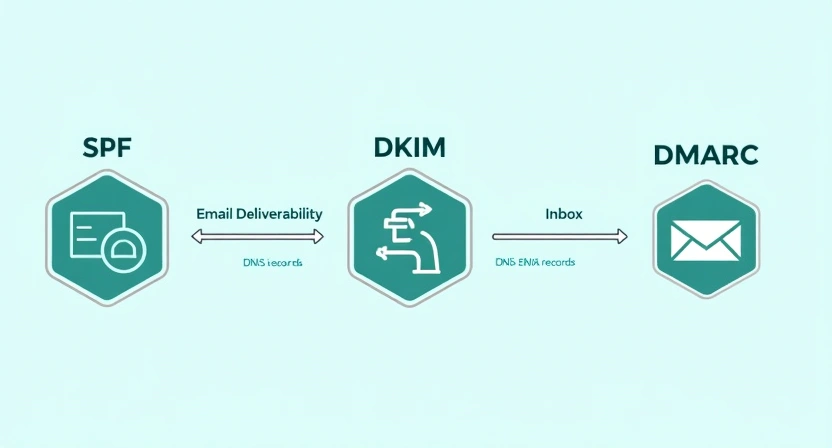
Setting up SPF (Sender Policy Framework), DKIM (DomainKeys Identified Mail), and DMARC (Domain-based Message Authentication, Reporting, & Conformance) records is a fundamental requirement for robust email deliverability, security, and sender reputation. These three protocols work in tandem to authenticate your outgoing emails, verify your domain's legitimacy, and provide a framework for handling unauthenticated messages, thereby protecting your brand from spoofing and phishing while ensuring your legitimate communications reach their intended recipients.
The Crucial Role of Email Authentication Protocols
In the vast ecosystem of email, trust is paramount. Without proper authentication, any sender could potentially impersonate your domain, leading to phishing attacks, spam distribution, and severe damage to your brand's reputation. Mailbox providers, such as Gmail, Outlook, and Yahoo, heavily rely on these authentication protocols to distinguish legitimate emails from malicious ones. Failing to implement SPF, DKIM, and DMARC significantly increases the likelihood of your emails being marked as spam or rejected outright, directly impacting your marketing campaigns and critical business communications.
Why Email Authentication Matters for Your Business
- Improved Deliverability: Authenticated emails are more likely to land in the inbox, as they signal trustworthiness to receiving mail servers.
- Enhanced Sender Reputation: Consistently sending authenticated emails builds a positive reputation with ISPs, which is crucial for long-term deliverability.
- Brand Protection: Deters unauthorized parties from spoofing your domain, safeguarding your brand's integrity and customer trust.
- Phishing and Spam Prevention: Minimizes the effectiveness of phishing campaigns and reduces spam originating from your domain.
- Compliance and Security: Meets modern email security standards and helps comply with various data protection regulations.
Understanding SPF (Sender Policy Framework)
SPF is an email authentication standard designed to prevent sender address forgery. It allows domain owners to specify which mail servers are authorized to send email on behalf of their domain. Receiving mail servers can then check this SPF record to verify that an incoming email from a domain genuinely originates from an authorized server.
How SPF Works
When an email is sent, the receiving mail server performs an SPF check. It looks up the sender's domain's SPF record in the DNS. This record lists all IP addresses and mail servers permitted to send email for that domain. If the sending server's IP address is not listed in the SPF record, the email may be flagged as suspicious, quarantined, or rejected, depending on the SPF policy defined by the sender.
Components of an SPF Record
An SPF record is a TXT record added to your domain's DNS. It starts with v=spf1, followed by various mechanisms and qualifiers that define the sending policy.
v=spf1 ip4:192.0.2.1 include:_spf.example.com -allHere’s a breakdown of common SPF mechanisms and qualifiers:
Qualifiers: Prefixes that determine how a receiving server should handle an SPF check result.
+(Pass): Explicitly passes the SPF check. (Default if no qualifier is specified).-(Fail): Hard fail. The server is not authorized. The email should be rejected.~(SoftFail): Soft fail. The server is likely not authorized. The email should be accepted but marked.?(Neutral): No policy is stated. The email should be accepted.
Mechanisms: Specify which hosts are authorized to send email.
| Mechanism | Description | Example |
|---|---|---|
a |
Grants permission if the sender's IP address matches the A record of the domain. | a |
mx |
Grants permission if the sender's IP address matches the MX records for the domain. | mx |
ip4 |
Grants permission for a specific IPv4 address or range. | ip4:192.0.2.1 or ip4:192.0.2.0/24 |
ip6 |
Grants permission for a specific IPv6 address or range. | ip6:2001:db8::1 |
include |
Includes the SPF record of another domain. Essential for ESPs. | include:_spf.postigo.com |
exists |
A DNS A record lookup is performed on the specified domain. If it exists, SPF passes. | exists:%{i}.%{d}.spf.example.com |
redirect |
Points to another domain's SPF record. Only one redirect mechanism is allowed, and no other mechanisms can follow it. |
redirect=anotherdomain.com |
all |
Always matches and should be the last mechanism. Defines the default policy for all other sending servers. | -all (Hard Fail) or ~all (Soft Fail) |
Creating and Adding Your SPF Record
Most domains will only have one SPF record. If you use multiple services (e.g., your own mail server, Postigo for marketing, a CRM for transactional emails), you must include all authorized senders in a single SPF record.
- Identify all sending services: List every platform that sends email on behalf of your domain (e.g., Google Workspace, Microsoft 365, Postigo, Salesforce, etc.).
- Gather SPF includes: Each service usually provides an SPF include mechanism. For Postigo, this might be something like
include:_spf.postigo.com(check your Postigo account for the exact value). - Construct the record: Combine all necessary mechanisms. Always start with
v=spf1and end with anallmechanism. - Example: If you use Google Workspace and Postigo, your SPF record might look like this:
v=spf1 include:_spf.google.com include:_spf.postigo.com ~allIn this example,
~allis used as a soft fail. For maximum security, many recommend moving to-allonce you are confident all legitimate senders are covered. - Add to your DNS: Log in to your domain registrar or DNS hosting provider (e.g., GoDaddy, Cloudflare, Namecheap).
- Create a new TXT record:
- Type: TXT
- Host/Name:
@or your domain (e.g.,yourdomain.com). Leave blank if@is not an option. - Value: Your complete SPF record string (e.g.,
v=spf1 include:_spf.google.com include:_spf.postigo.com ~all) - TTL (Time To Live): Typically 3600 seconds (1 hour) or 14400 seconds (4 hours).
Important Note: A domain can only have one SPF TXT record. Multiple SPF records will invalidate your SPF authentication.
Understanding DKIM (DomainKeys Identified Mail)
DKIM provides a method for an email sender to digitally sign outgoing email messages. This signature is cryptographically linked to the sender's domain, allowing recipients to verify that the email was indeed authorized by the domain owner and that its content has not been tampered with in transit.
How DKIM Works
When an email is sent, the sending server generates a unique cryptographic signature based on parts of the email (like the headers and body) using a private key. This signature is then added to the email's header. The corresponding public key is published in the sender's domain's DNS as a TXT record. When a receiving server gets the email, it uses the public key from the DNS to verify the signature. If the signature matches, the email is considered authentic and untampered.
Components of a DKIM Record
A DKIM record is a TXT record that contains the public key and other parameters. It is typically prefixed with a "selector," which allows for multiple DKIM keys for a single domain (e.g., one for your transactional emails, another for your marketing emails).
selector._domainkey.yourdomain.com TXT "v=DKIM1; k=rsa; p=MIGfMA0GCSqGSIb3DQEBAQUAA4GNADCBiQKBgQDzQoN..."Common DKIM tags:
v=DKIM1: Version of DKIM.k=rsa: Key type (RSA is standard).p=: The public key string. This is usually a long, alphanumeric string.s=: Selector (part of the hostname).t=y: Test mode (optional, indicates DKIM is in test mode).h=sha256: Hash algorithm used.
Generating and Adding Your DKIM Record
Unlike SPF, you usually don't manually construct DKIM records. Your Email Service Provider (ESP) or mail server software generates the DKIM key pair for you.
- Generate DKIM keys: Most ESPs, including Postigo, will provide you with the DKIM record directly from your settings. You typically specify the domain you want to send from, and the platform generates a unique DKIM key pair (a private key for signing and a public key for your DNS).
Example: In your Postigo account settings, navigate to 'Sending Domains' or 'Domain Authentication'. You will likely find an option to generate or view your DKIM record.
- Identify your selector: The generated DKIM record will include a selector (e.g.,
s1,pm._domainkey, or a random string). This selector is part of the hostname you'll add to your DNS. - Add the DKIM TXT record to your DNS: Log in to your domain registrar or DNS hosting provider.
- Type: TXT
- Host/Name: This will be your selector plus
._domainkeyand your domain. For example, if your selector ispostigoand your domain isyourdomain.com, the Host/Name would bepostigo._domainkey.yourdomain.com. - Value: The entire public key string provided by your ESP, enclosed in quotes. It might look like
"v=DKIM1; k=rsa; p=MIGfMA0GCSqGSIb3DQEBAQUAA4GNADCBiQKBgQDzQoN..." - TTL: Typically 3600 seconds (1 hour).
- Verify the DKIM record: After publishing, return to your ESP's domain settings to verify the record. It might take some time for DNS changes to propagate.
Note: You can have multiple DKIM records for a single domain, each with a different selector, allowing different services to sign emails independently.
Understanding DMARC (Domain-based Message Authentication, Reporting, & Conformance)
DMARC builds upon SPF and DKIM, providing a powerful framework to tie them together. It allows domain owners to tell receiving mail servers what to do with emails that fail SPF or DKIM authentication (e.g., quarantine or reject them) and provides a reporting mechanism for domain owners to receive feedback on their email streams.
How DMARC Works
A DMARC record, published in your DNS as a TXT record, instructs receiving mail servers on how to handle emails that purport to be from your domain but fail either SPF or DKIM authentication. Crucially, DMARC introduces the concept of "alignment." For an email to pass DMARC, the domain in the "From" header (the one users see) must align with the domain that passes SPF or DKIM. If an email fails authentication or alignment, the DMARC policy tells the receiving server whether to do nothing, quarantine it, or reject it. DMARC also enables aggregate (RUA) and forensic (RUF) reporting, giving domain owners insights into their email authentication status.
Components of a DMARC Record
A DMARC record is a TXT record published at _dmarc.yourdomain.com.
v=DMARC1; p=none; rua=mailto:dmarc-reports@yourdomain.com; fo=1; adkim=r; aspf=sHere are the essential and common DMARC tags:
| Tag | Description | Required | Example Value |
|---|---|---|---|
v |
Protocol version. Must be DMARC1. |
Yes | v=DMARC1 |
p |
Policy for messages that fail DMARC.
|
Yes | p=none |
rua |
Email address for aggregate reports. Reports summarize daily DMARC results. | No (highly recommended) | rua=mailto:dmarc-reports@yourdomain.com |
ruf |
Email address for forensic reports. Reports on individual failures (can contain sensitive info, often not used). | No | ruf=mailto:forensic@yourdomain.com |
fo |
Failure reporting options.
|
No | fo=1 |
adkim |
DKIM alignment mode.
|
No (default r) |
adkim=r |
aspf |
SPF alignment mode.
|
No (default r) |
aspf=s |
pct |
Percentage of messages to apply the DMARC policy to (for staged rollout). | No (default 100) |
pct=25 |
sp |
Policy for subdomains (optional). Same options as p. |
No | sp=quarantine |
Creating and Adding Your DMARC Record (Gradual Rollout)
A DMARC rollout should always be gradual to avoid inadvertently blocking legitimate emails.
- Ensure SPF and DKIM are fully implemented and verified: DMARC relies on these foundations. Do not implement DMARC before SPF and DKIM are correctly set up and passing for all legitimate senders.
- Start with a monitoring policy (
p=none): This policy tells receiving servers to collect data and send reports without affecting email delivery. This phase is crucial for understanding your email ecosystem.Initial DMARC Record:
v=DMARC1; p=none; rua=mailto:dmarc-reports@yourdomain.comReplace
dmarc-reports@yourdomain.comwith an email address you can access and monitor. Consider using a dedicated inbox or a DMARC reporting service for easier analysis. - Add to your DNS: Log in to your domain registrar or DNS hosting provider.
- Type: TXT
- Host/Name:
_dmarc(or_dmarc.yourdomain.comdepending on your DNS provider's interface). - Value: Your complete DMARC record string (e.g.,
v=DMARC1; p=none; rua=mailto:dmarc-reports@yourdomain.com) - TTL: Typically 3600 seconds (1 hour).
- Analyze DMARC reports: Over the next few weeks, you'll receive XML reports from various mailbox providers (like Gmail, Outlook). These reports provide invaluable data on who is sending email from your domain, which emails are passing/failing SPF and DKIM, and why. Tools and services (including some ESPs like Postigo) can help parse and visualize these reports, making them easier to understand.
- Transition to
p=quarantine: Once you're confident that all legitimate emails are passing SPF and DKIM, and you've identified any unauthorized senders, you can update your policy. Start with a small percentage (pcttag) and gradually increase it.Example (25% quarantine):
v=DMARC1; p=quarantine; pct=25; rua=mailto:dmarc-reports@yourdomain.comMonitor reports closely after each adjustment.
- Transition to
p=reject: After successfully quarantining 100% of non-compliant emails for a period and verifying no legitimate mail is affected, you can move to the strongest policy:p=reject. This tells receiving servers to outright block any emails failing DMARC authentication.Final DMARC Record:
v=DMARC1; p=reject; rua=mailto:dmarc-reports@yourdomain.com
This phased approach is critical to prevent legitimate emails from being blocked during the DMARC implementation process. For more on DMARC monitoring and reporting, see our guide on DMARC Reporting Best Practices.

Consolidated Step-by-Step Implementation and Verification
Phase 1: Setting Up SPF
- List all services that send email on behalf of your domain.
- Compile an SPF record including all necessary
includemechanisms and ending with~all(soft fail) initially. - Add this as a TXT record to your root domain (
@) in your DNS. - Use an online SPF checker tool to verify the record's syntax and lookup limit.
Phase 2: Setting Up DKIM
- Generate DKIM keys through your ESP (e.g., Postigo) or mail server. Your ESP will provide the full TXT record value and the hostname (selector).
- Add this as a TXT record in your DNS, using the provided hostname (e.g.,
selector._domainkey.yourdomain.com). - Verify the DKIM record through your ESP's domain settings or an online DKIM checker tool.
Phase 3: Implementing DMARC (Gradual Rollout)
- Start with Monitoring: Add a DMARC TXT record with
p=noneand aruaaddress to_dmarc.yourdomain.com. - Monitor Reports: Continuously analyze the aggregate DMARC reports to understand your email traffic and identify legitimate senders that might be failing SPF/DKIM. Adjust SPF/DKIM records as needed.
- Gradual Enforcement:
- Once confident, update the DMARC record to
p=quarantine; pct=10. Monitor. - Increase
pct(e.g., 25%, 50%, 75%, 100%) while monitoring reports after each increase. - Finally, update to
p=reject; pct=100to fully protect your domain.
- Once confident, update the DMARC record to
- Regular Review: Even after full implementation, periodically review DMARC reports, especially if you add new sending services.
Tools for Verification
Numerous online tools can help you verify your SPF, DKIM, and DMARC records:
- MXToolbox SPF Lookup
- MXToolbox DKIM Lookup
- MXToolbox DMARC Lookup
- Google Admin Toolbox Dig: Useful for general DNS lookups.
Common Pitfalls and Troubleshooting
- Too Many SPF Lookups: An SPF record has a 10-lookup limit. Exceeding this will cause SPF validation to fail. Use an SPF flattening service or consolidate includes where possible.
- Incorrect DNS Syntax: A single typo can invalidate your records. Double-check all values, especially long DKIM public keys and DMARC RUA addresses.
- Multiple SPF Records: A domain must only have one SPF TXT record. Merge all authorized senders into a single record.
- DNS Propagation Delays: DNS changes can take minutes to hours (up to 48 hours in rare cases) to propagate across the internet. Be patient before re-checking.
- DKIM Alignment Issues: Ensure the "From" header domain aligns with the DKIM signing domain. Some ESPs might sign with a subdomain by default; ensure your DMARC policy allows for relaxed alignment (`adkim=r`).
- SPF Alignment Issues: Similarly, the "Return-Path" domain (used by SPF) must align with the "From" header domain for DMARC to pass. Relaxed SPF alignment (`aspf=r`) can help.
- DMARC Reports Not Arriving: Verify the
ruaemail address is correct and check your spam folder. Ensure your DMARC record is correctly published.
For more detailed troubleshooting, refer to our guide on Email Deliverability Troubleshooting.
The Role of Your Email Service Provider (ESP) Like Postigo
An advanced ESP like Postigo simplifies the complexities of email authentication significantly. While you still need to add DNS records, Postigo often:
- Generates DKIM Records: Provides you with the exact DKIM TXT record and hostname (selector) to add to your DNS, eliminating manual key generation.
- Guides SPF Setup: Clearly states the
includemechanism required for their sending infrastructure, making it easy to integrate into your existing SPF record. - Offers Domain Verification: Guides you through the process of verifying your sending domain by checking if SPF and DKIM records are correctly published.
- Provides Deliverability Insights: Some ESPs may offer reporting features that give insights into your email authentication status and DMARC performance, though direct DMARC report parsing is often handled by specialized DMARC monitoring services.
Leveraging these features from your ESP ensures that your outbound emails sent through their platform are correctly authenticated, maximizing your deliverability and protecting your domain.
Conclusion
Setting up SPF, DKIM, and DMARC is not merely a technical task; it's a foundational step towards building and maintaining trust in your email communications. These protocols are indispensable for robust email deliverability, protecting your brand from impersonation, and safeguarding your recipients from malicious attacks. While the process involves several steps and careful attention to detail, the long-term benefits of enhanced sender reputation, improved inbox placement, and strengthened security far outweigh the initial effort.
By following this comprehensive guide, you can confidently implement these critical authentication standards for your domain. Regularly monitor your DMARC reports and adjust your policies as needed to ensure continuous protection and optimal email performance. With these protocols in place, your legitimate emails will stand a far greater chance of reaching their intended audience, fostering reliable communication and stronger connections with your customers.
Related Posts


Ready to scale your outreach?
Start sending personalized cold emails with AI-powered automation. Free trial, no credit card required.
Start Free Trial arrow_forward